- 2.0 1CRM: Getting Started
- 2.1 Before You Begin
- This guide assumes that the resources you need to access the system are available and that you are familiar with how to use them. If you are not sure whether your system meets the requirements or how to use required third-party tools (primarily a web browser), talk to your manager or system administrator.
- 2.1.1 Technical Requirements
- Before you begin using the system, ensure that you have the appropriate software installed and configured on your system. All you will need is –
- A current web browser running on your computer.
- 1CRM has been tested with and supports a variety of browsers. The following browsers are acceptable for use with 1CRM:
- Chrome version 61 and later - www.google.com/chrome/
- Safari version 12 and later - www.apple.com/safari/
- Firefox version 67 and later - www.mozilla.org/firefox
- Default browser on recent iPad, iPhone, or Android devices
- You will encounter problems if you try to access 1CRM using older or unsupported web browsers. If you are unsure about which web browser version you are using, click Help > About… or similar options on the menu bar in your browser. The version number will be displayed.
- Both JavaScript and cookies support must be enabled in the security settings of your browser and is usually turned on by default.
- If you encounter problems accessing the system, check your browser configuration to ensure both JavaScript support and cookies support are enabled. (See Tools > Options > Privacy and Web Features tabs in Firefox.)
- Alternatively, a current web browser running on your mobile device.
- 1CRM has been tested with and supports a variety of mobile devices. iPhones and iPads with iOS 12 or later will work well, as will most phones and tablets running Android 9 (Pie) or later. Other mobile devices using webkit-based browsers will likely function as well.
- Network access to a server that is running the 1CRM software.
- Your system or network administrator will be able to provide you with an Internet address (URL) from which the system can be accessed.
- 2.1.2 Web Browser and Window Controls
- 1CRM dynamically creates the HTML screens displayed by the web browser when you click certain buttons.
- Using ‘back’ and ‘forward’ buttons can cause problems displaying these dynamically generated pages. For this reason, we do not recommend using these controls on your browser when operating 1CRM.
- 1CRM is designed for a minimum 1024x768-pixel screen display resolution when used on laptops and desktop computers, with a 1280x768 or greater screen size preferred. But it will automatically reconfigure the screen layout for smaller screens on smartphones and tablet computers.
- 2.1.3 Log In Information
- If you do not provide the correct user name and password, 1CRM will not allow you access to the system.
- Your system administrator assigns log in information – a user name and password – to every system user. If you have not received your user name and password combination, contact your system administrator.
- 2.2 Accessing 1CRM
- To access 1CRM, type the URL into your web browser’s address bar. You should see a screen similar to the one shown below:
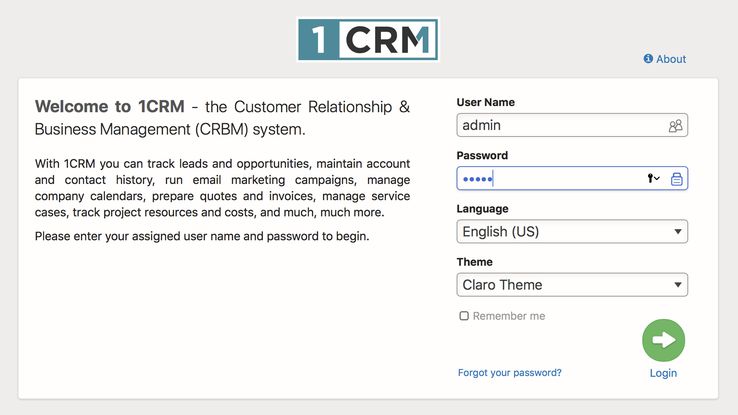
- Figure 1: The 1CRM Login Screen
- This is the 1CRM log in screen. If you do not see a log in screen, verify that you have entered the URL correctly. If you did not make a typing mistake, contact your system administrator to verify that you have the correct URL.
- To proceed, you must log in to the system by providing a valid user name and password.
- You may also choose the language (US English, Français (French), Español (Spanish), Italiano (Italian) and Deutsch (German) and/or others may be available on your particular system) that you want to use with the system, and the ‘theme’ or visual appearance you want the system to have.
- 2.2.1 To log in to the System…
- In the 1CRM log in screen –
- Type your user name in the User Name box.
- Type your password in the Password box. (Note: System passwords are case-sensitive.)
- Select the language and theme that you want to use. (Note that your theme choice can also be changed at any time, using a dropdown control in the footer of each screen in 1CRM.)
- Click the
 button.
- Note: After three failed login attempts, login access for that username is suspended for 5 minutes. Following that, the next failure (without a successful login) causes a 20 minute timeout, then 45 minutes, and increasing. If an Admin updates your password, the suspension is lifted.
- 2.2.2 CRMFlex for Android and iOS
- Anywhere, any device, any time. That has to be the mantra in today’s business world for how you respond to your clients’ needs. Accordingly, 1CRM is designed as much for use on smartphones and tablets as it is for laptop and desktop computers. The ability of 1CRM to adapt its screen presentation to best suit the screen size of the device you are using is called CRMFlex. (In computer terminology, 1CRM is responsive.)
- To take advantage of CRMFlex simply enter the normal URL for your 1CRM system in the address bar of your smartphone or tablet browser, and login using your usual username and password. Let’s have a quick look at the same 1CRM screen, as seen in the browser of different devices:
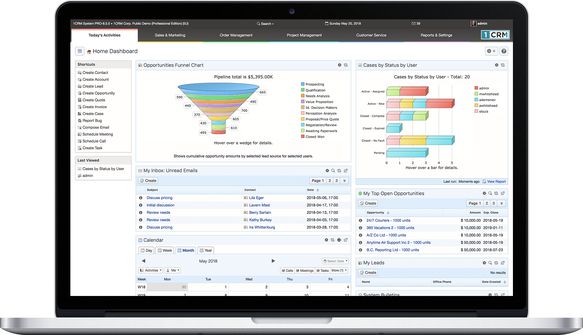
- Figure 2: MacBook Pro 13” (Chrome)
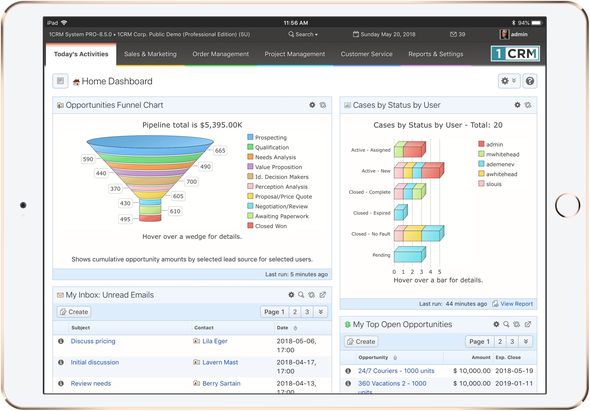
- Figure 3 : iPad Pro 10.5” landscape mode (Firefox)
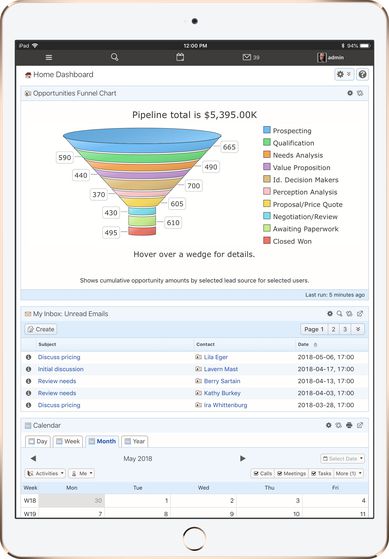
- Figure 4: iPad Pro 10.5” Portrait mode (Firefox)
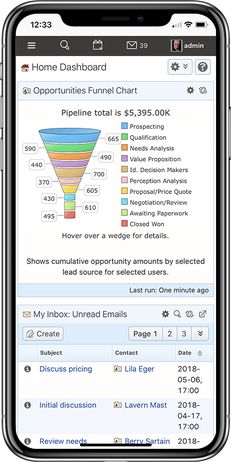
- Figure 5: iPhone X (Firefox)
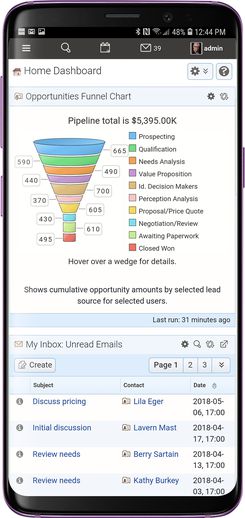
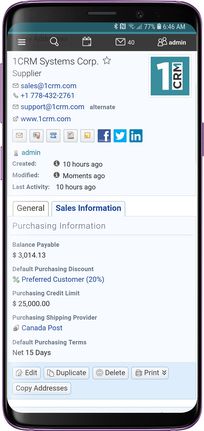
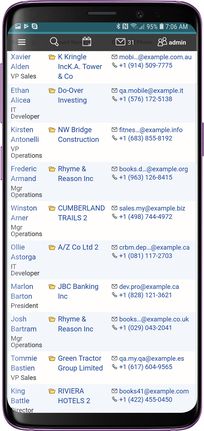
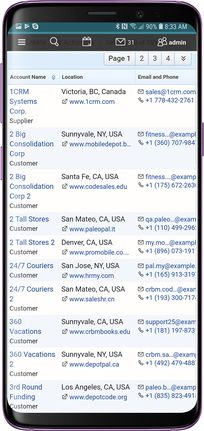
- Figure 6: Samsing Galaxy S9+ (Chrome)
- What we notice is that while clearly we see different amounts of data on each device, the way data is presented and the way the system is navigated is very similar across all devices. This way you don’t have to learn all new techniques to use 1CRM on different devices.
- Some of the key points you should know include:
- Smartphone Layout Mode
- CRMFlex shifts to Smartphone Layout mode when the width of your browser screen is typical for a smartphone. We recommend you use a smartphone with at least a 4.7” screen, such as an iPhone 6/7/8, to ensure the best experience.
- Claro theme is used, regardless of the theme you have selected. Your selected theme will be used on other devices.
- The complete 1CRM system is available to you: all modules plus administration. Even modules that you might expect to require larger screens, such as Quotes and Invoices, have been adapted for elegant smartphone operation.
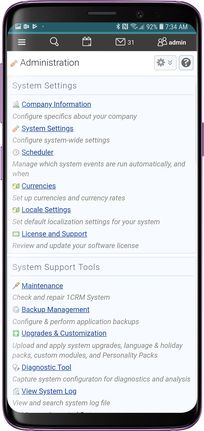
- The menu system is now condensed, and accessed via a hamburger style icon
 on the left end of the top bar.
- The sidebar that contains shortcuts and last viewed items is not shown.
- Shortcuts are available when you tap the menu icon
 . (See Figure 8)
- Last viewed items are available when you tap on Search. (See Figure 9)
- Dashboards all adopt a single column layout.
- When you click on phone numbers within 1CRM, you can choose if dialling will use the phone in your smartphone, or an app corresponding to your system’s chosen IP Telephony service (Skype or RingCentral).
- On both Android smartphones and iPhones you can add an icon for 1CRM to the home screen of your device, so that you access 1CRM just as you would any smartphone app.
- Tablet Layout Mode
- CRMFlex shifts to Tablet Layout mode when the width of your browser screen is typical for a tablet.
- If you are using a tablet device in landscape mode to access 1CRM, such as an iPad, iPad Pro or iPad mini, you will usually (depending on tablet size) see the normal full 1CRM menu bar interface as shown in Figure 3. Dashboards will not be forced to single column mode. The sidebar is collapsed by default, but as usual it may be expanded by the
 button found near the left edge of the screen.
- With a tablet in portrait mode you will usually see the smartphone type condensed menu bar as shown in Figure 4. Dashboards will adopt a single column layout, and the sidebar that contains shortcuts and last viewed items is not shown.
- We recommend an iPad Air, Pro or Mini with LTE support as a very compact mobile device with which to use 1CRM. Or just link to your phone for an Internet connection using Apple’s Personal Hotspot feature.
- Your selected theme will be used: Claro theme is not enforced.
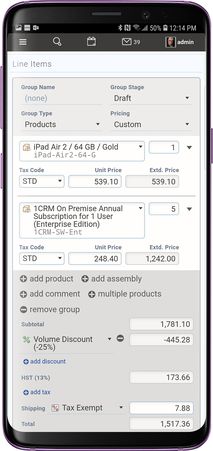
- Figure 7: Preparing a Quote in Smartphone Layout Mode (Galaxy S9+)
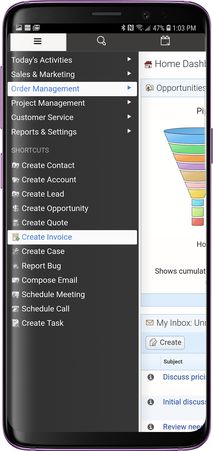
- Figure 8: Smartphone Menu & Shortcuts (Galaxy S9+)
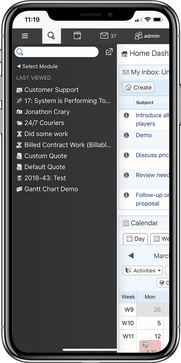
- Figure 9: Smartphone Search & Last Viewed (on iPhone X)
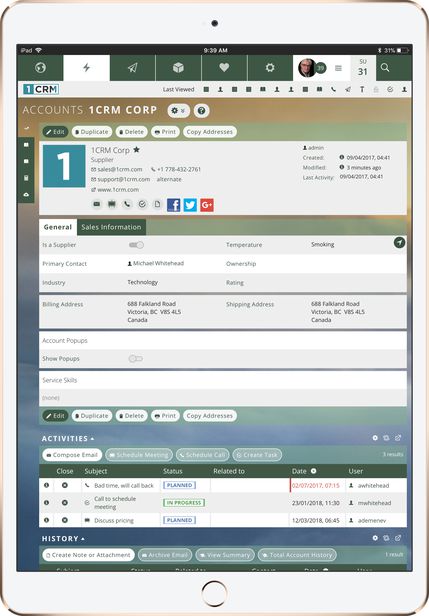
- Figure 10: CRMFLex (Flex Theme, Black Forest Scheme) on iPad Pro 10.5”
- 2.2.3 1CRM Mobile App for iPhone
- There is a free iPhone App available in the Apple App Store, as shown in Figures 11 and 12. It works with the 1CRM Professional and Enterprise Editions. You must use version 7.8.8 of 1CRM or above. For more information, see the 1CRM Mobile User Guide.
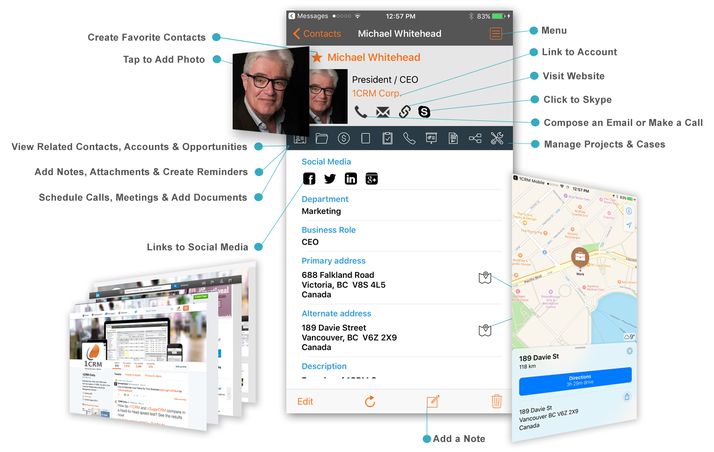
- Figure 11: 1CRM iPhone App
- Figure 12: 1CRM Mobile - iPhone App on iPhone 6S+
- 2.2.4 1CRM Mobile App for Android
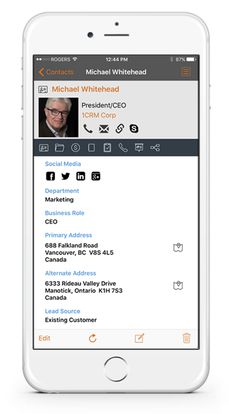
- There is a free Android App available in the Google Play Store, as shown in Figures 13 and 14. It works with all 1CRM Editions. You must use version 8.5.2 of 1CRM or later. For more information, see the 1CRM Mobile User Guide.
- Figure 13: 1CRM Mobile for Android - Sample Screens
- Figure 14: 1CRM Mobile for Android - Sample Screens
- 2.2.5 If you cannot log in…
- Verify that your username and password were entered correctly, including any capital letters.
- Contact your system administrator to verify that you have the correct username and password combination.
- Your account may have been disabled. Contact your system administrator.
- 2.2.6 Security Timeout
- For security reasons, the system will automatically log you out of the system if you do not perform any tasks for a period of time. By default, the system will not log you out until 30 minutes have elapsed without any activity. (This feature can be turned off, or the time period changed, via configuration parameters set by your Administrator.)
- When you are ready to resume working with the system, click any button on the screen. The system will automatically load the log in page for you. You can also close all web browser windows and re-load the log in page manually.
- 2.3 Managing Your Password
- When you are first given access to the system, your administrator will provide you with a password. For security reasons, you should change this password to another one that only you know. Ensure that you choose a password that is easy for you to remember, but difficult for another person to guess.
- You can change your password at any time. It is a good idea to change your password occasionally.
- 2.3.1 To change your password…
- Click the My Account link (see highlighted item 5, on Figures 15-18 below).
- On the My Account screen click on the
 button.
- In the Change Password dialog box which appears, type your new password in the New Password box, and again in the Confirm Password box.
Note: Passwords must be at least 6 characters long, and contain at least one numeric. A dynamic password strength indicator will show you the quality of your password.
- Click the Save button.
- 2.3.2 If you forget your password…
- If you forget your password, you must contact your system administrator, who will reset it to a value that you can use temporarily. You should then log in to the system, and change the password to a value of your own choosing, according to the procedure described above.
- 2.4 Logging Out of the System
- When you are finished working with the system, you should always log out of the system rather than just closing your web browser.
- When a user logs out, the system performs several ‘clean-up’ procedures, and then automatically returns the web browser window to the Login screen.
- To log out…
- Click the Logout link in the User Management area (see item 5, Figures 15-18 for various themes), in the top right hand area of the screen for most themes.
- If desired, you may now close the browser window.