Have you been looking for a CRM with Microsoft Teams integration? You’re in luck because 1CRM includes integration with the MS Teams online meeting system. When scheduling a meeting in the CRM, just check a box to also schedule a Microsoft Teams session. Invitation and reminder emails includes links to join the Teams session.

1CRM conveniently lets you integrate the client meetings you arrange in 1CRM with scheduled Microsoft Teams meetings you would normally need to setup separately. When scheduling a meeting in the CRM, just check a box to also schedule a Microsoft Teams session. The 1CRM Meeting when saved will display a link to the Teams session. Invitation and reminder emails also includes links to join the Teams meeting.
Schedule a 1CRM Meeting with an Online Teams Session
Step 1: Register 1CRM as an App in Azure
- Login to 1CRM as a System Administrator. Go to the Administration area of 1CRM. On the Company Information screen, scroll down to the Online Meetings panel, and set the Online Meeting Application to Microsoft Teams. (Requires 1CRM release 8.6.6 or later.)
- Go to the Microsoft Azure portal and login, then click Register an application. Note: Remember you may only use work accounts not personal ones.
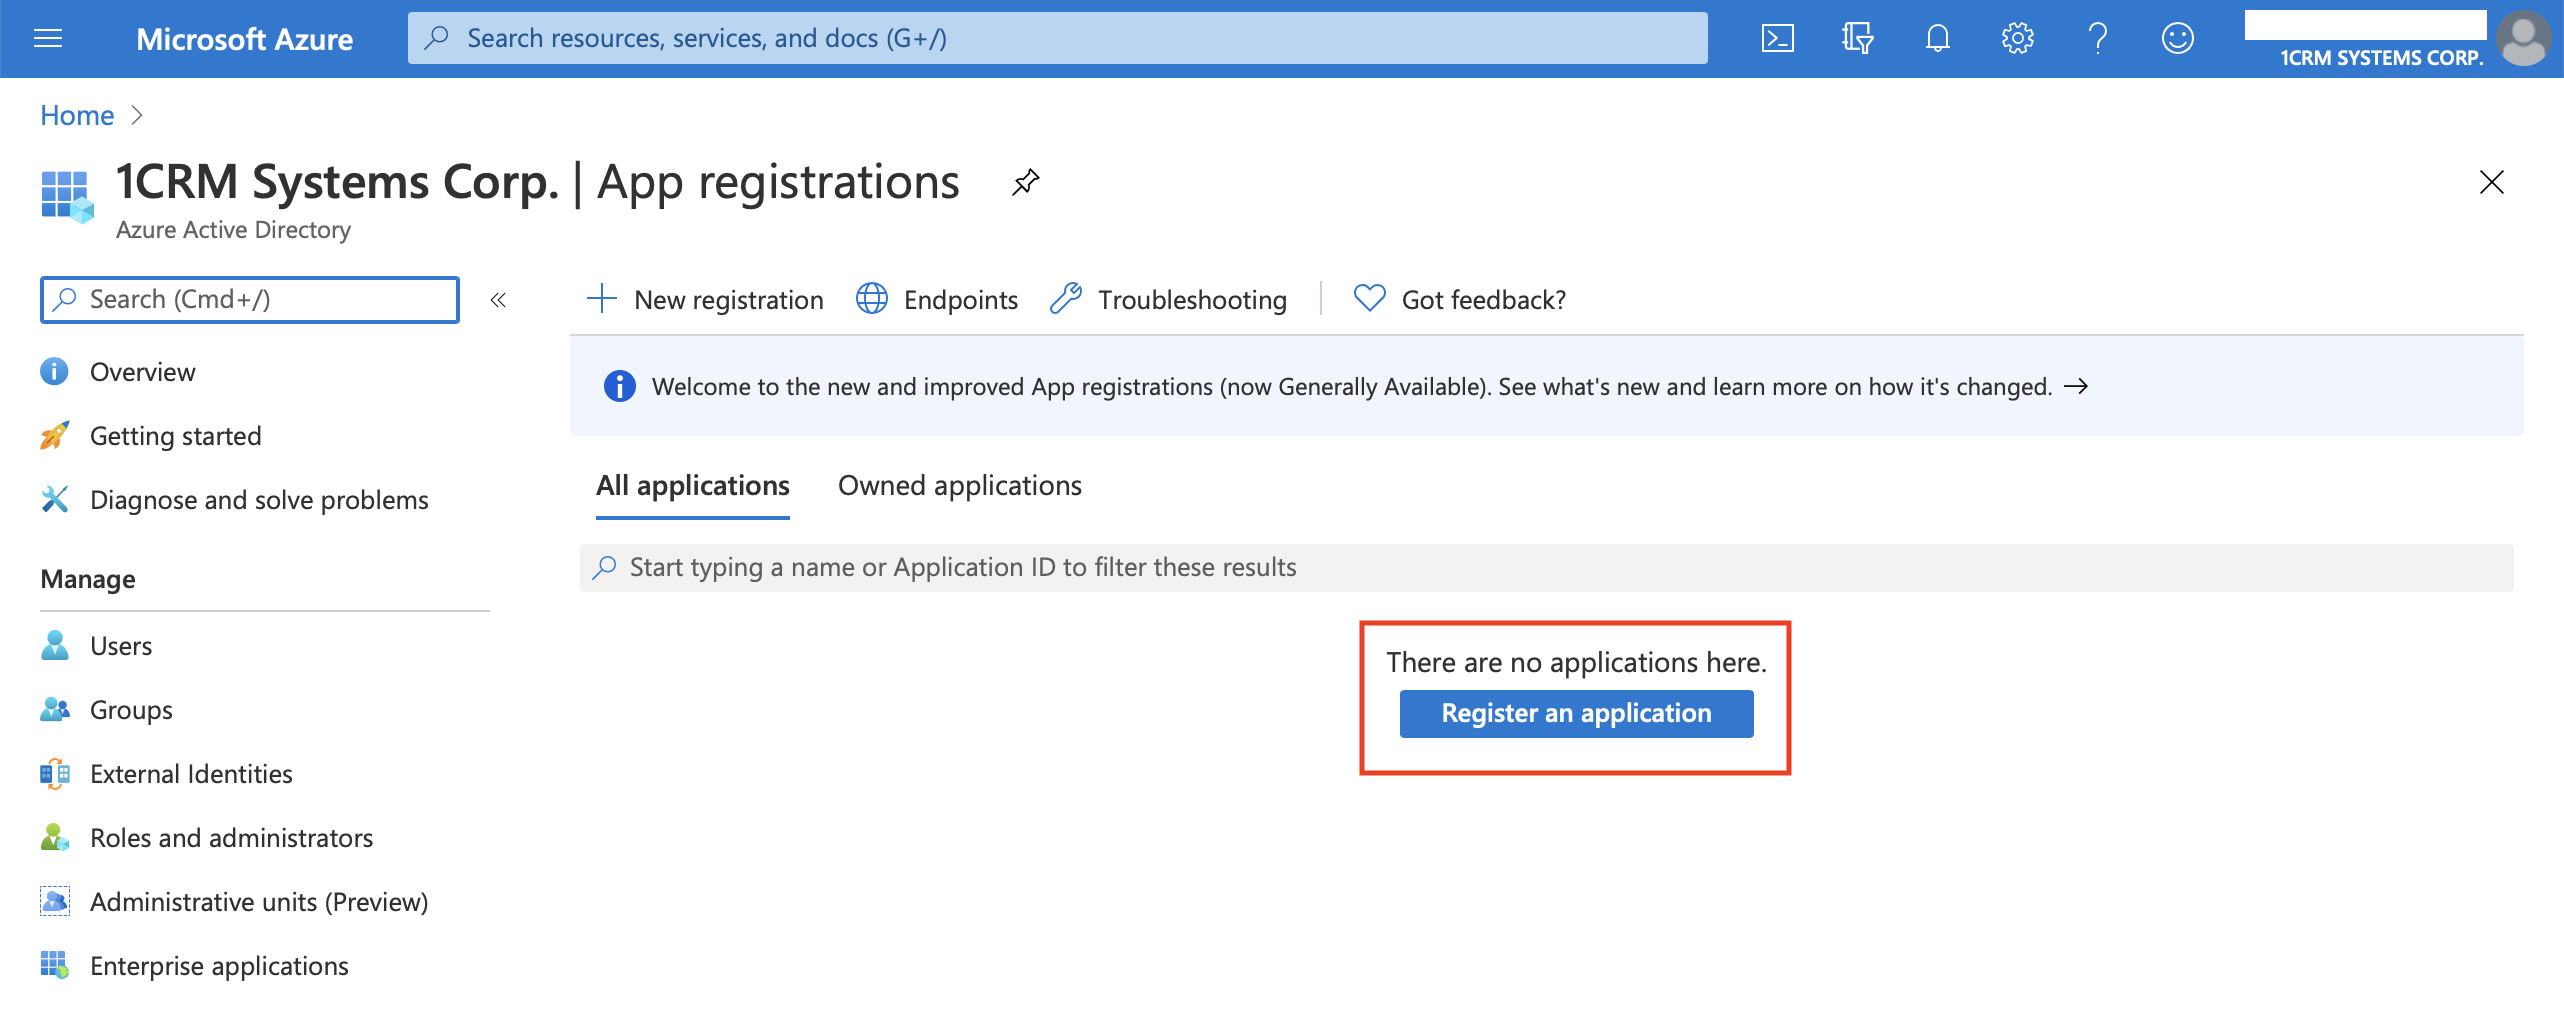
Register an Application
- Set the application name to 1CRM, select who can use the application and be sure to add your Redirect URI using this format: HTTPS://yourcrmsite/OnlineMeetingAuth.php (Replace yourcrmsite with your 1CRM URL).Then click the Register button.
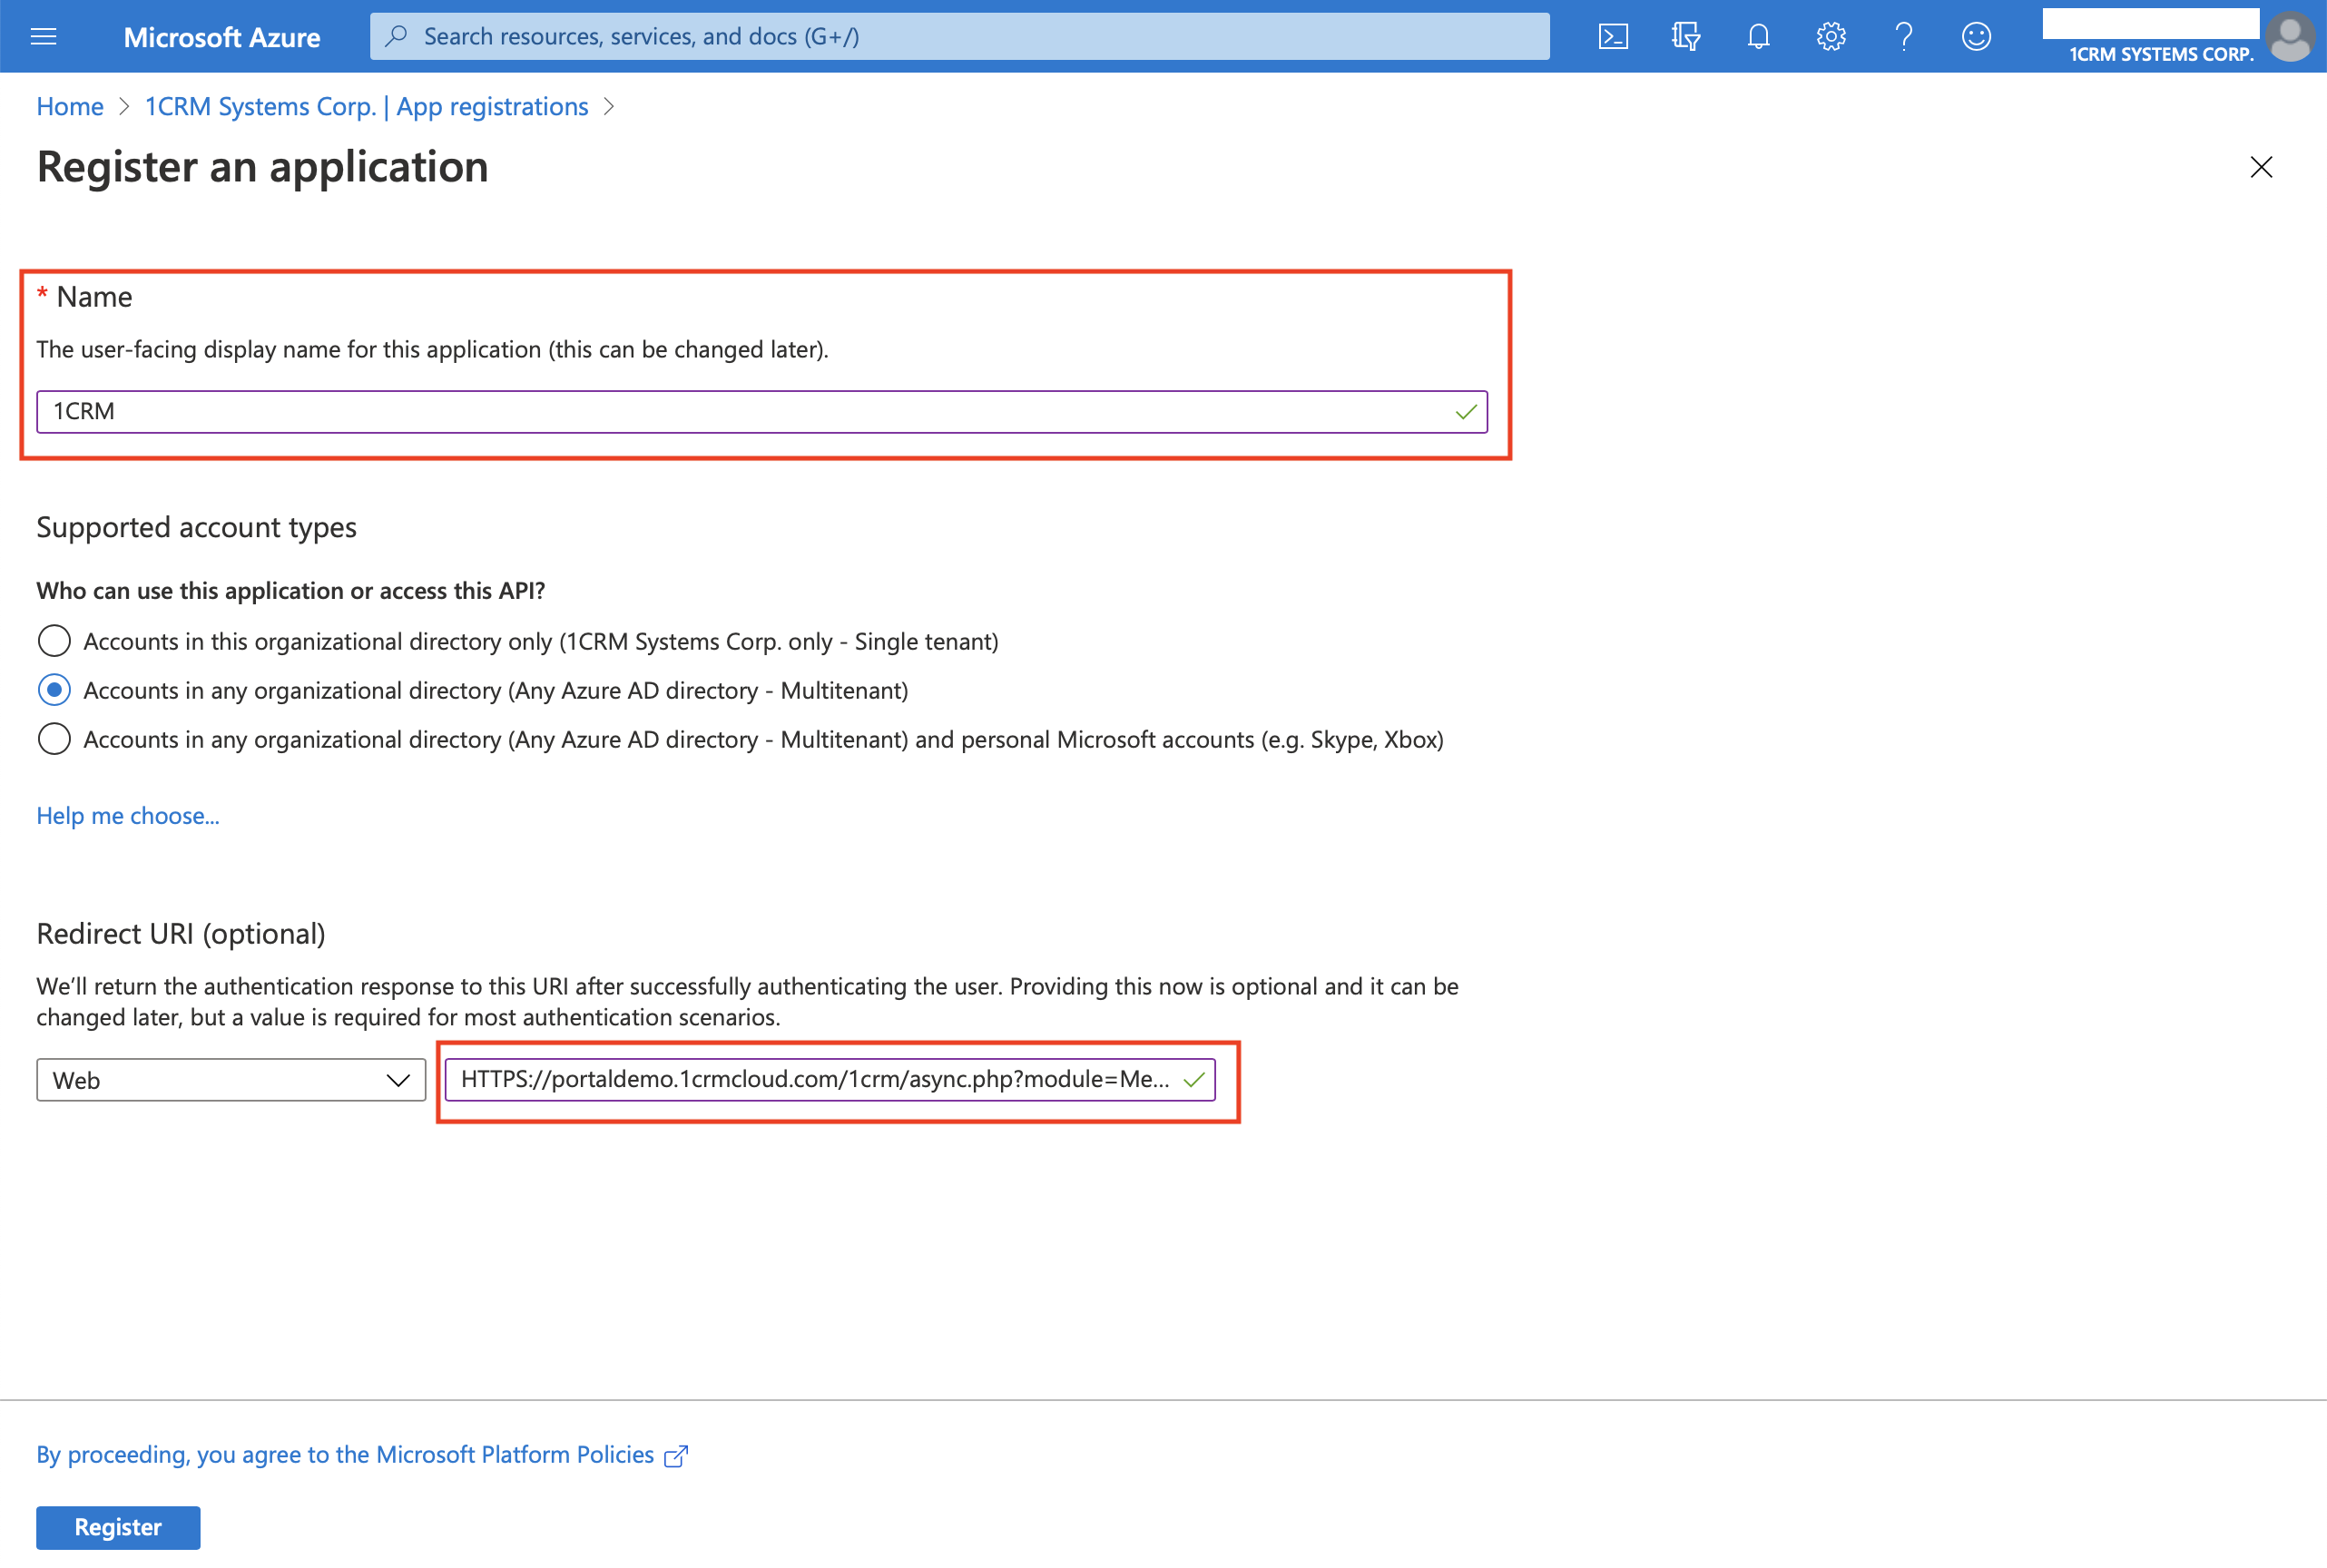
Register an Application (Part 2)
- From the resulting screen, copy the Application (client) ID value and paste it into the Client ID field of the Microsoft Teams Integration section of the Customer Information screen within the Administration area of 1CRM.
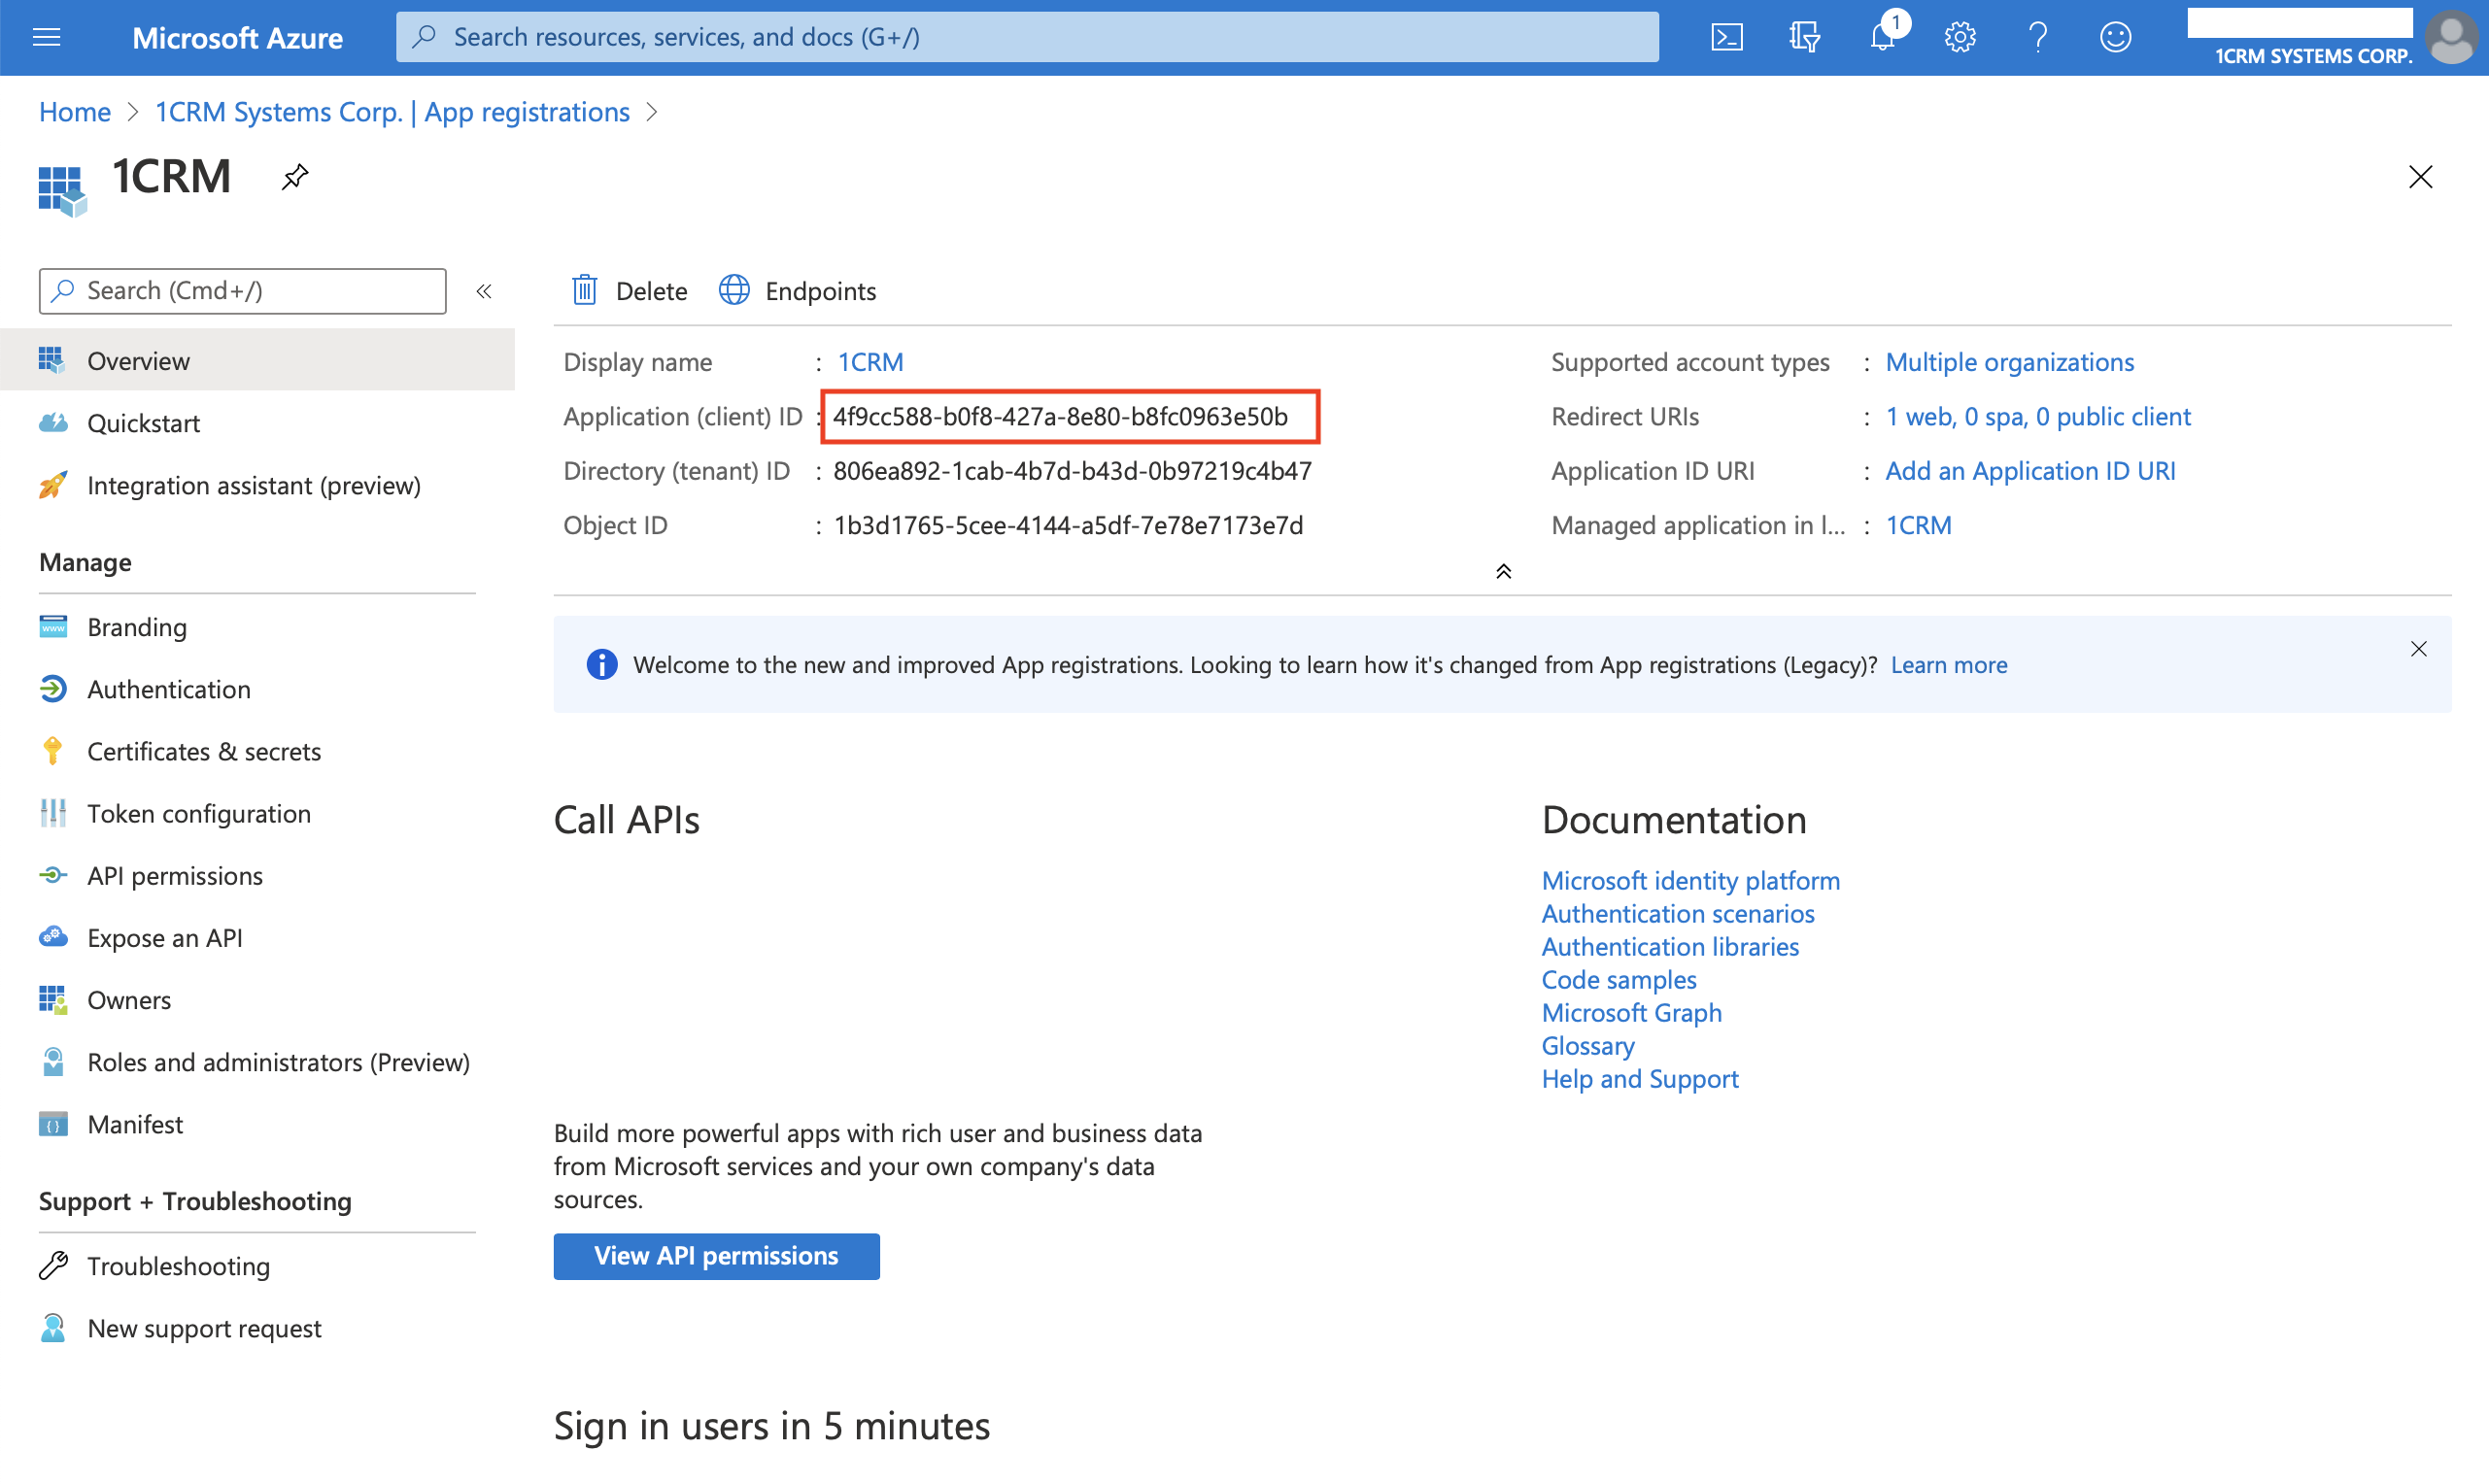
Set the Client ID
- Go to the Certificates & secrets page within the Azure Portal and click New client secret. After you create that secret, copy the Client secret value and paste it into the 1CRM Microsoft Teams Integration section, in the Client Secret field. Then Save Company Info.
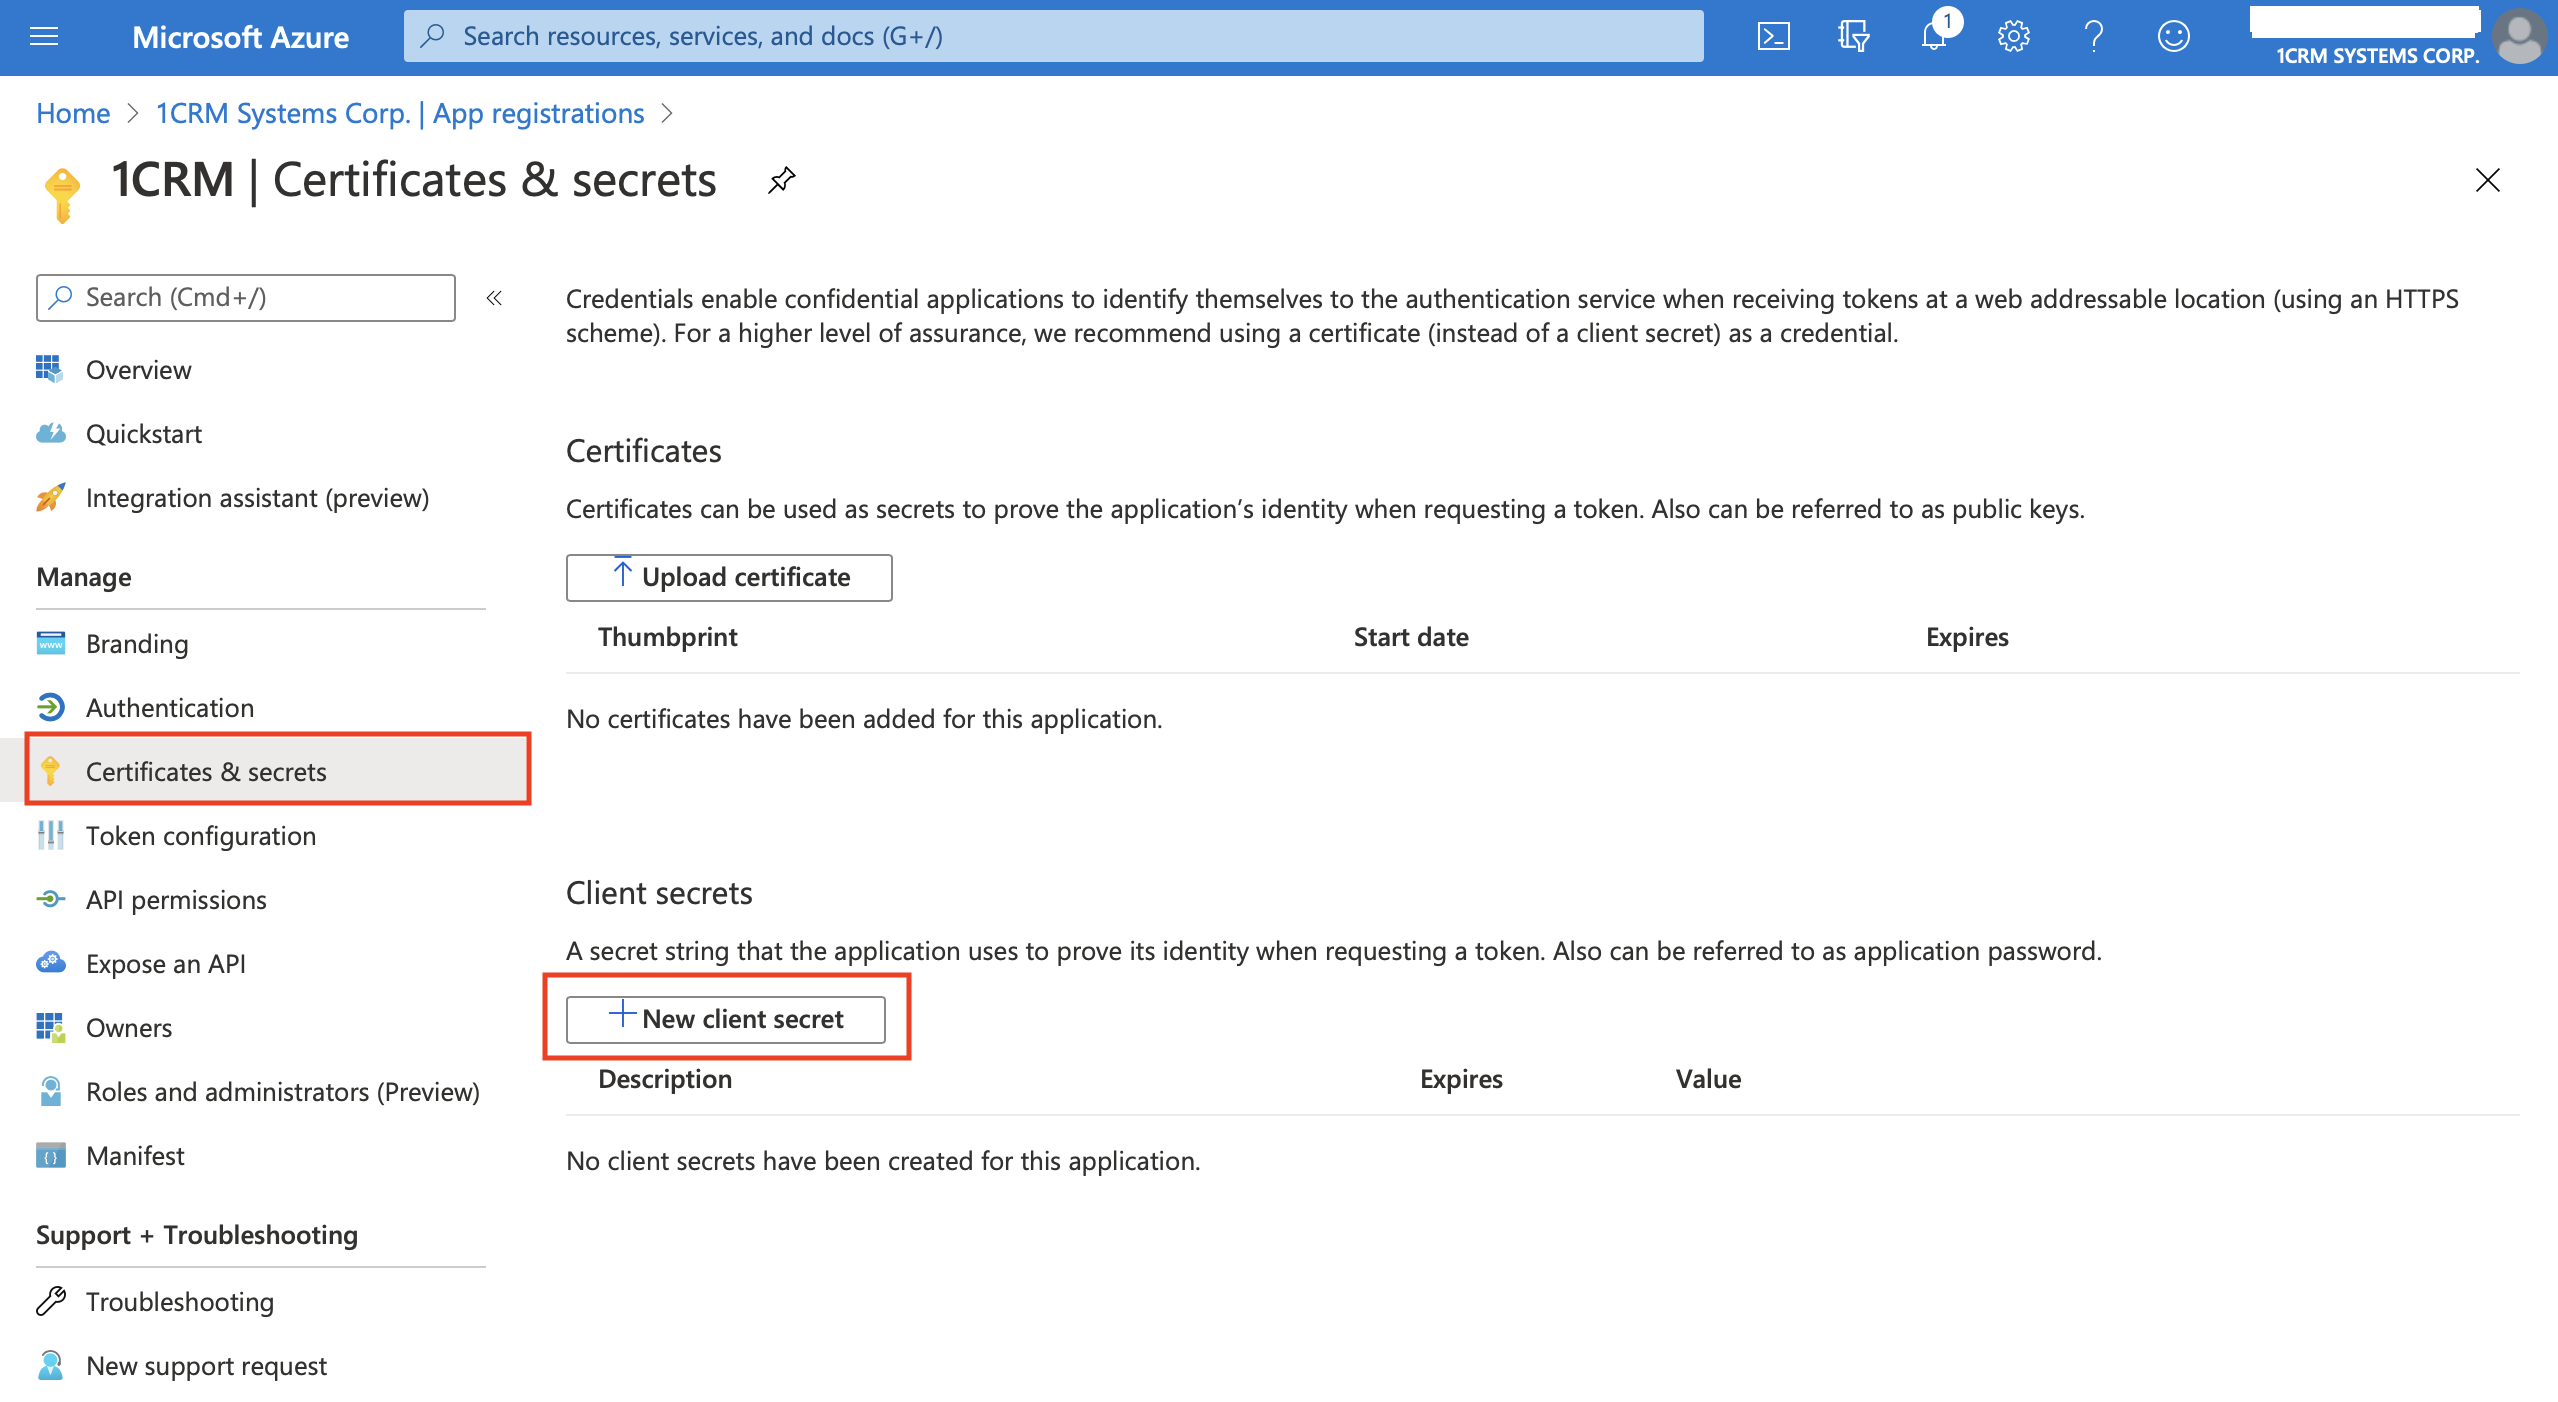
Set the Client Secret
- Go to the API permissions page within the Azure Portal and click Add a permission. Within Microsoft APIs select Microsoft Graph and then Delegated permissions. Scroll down to the OnlineMeetings item and tick the OnlineMeetings.ReadWrite checkbox. You can also tick the profile and offline_access checkboxes if desired. Then click on Add permissions.
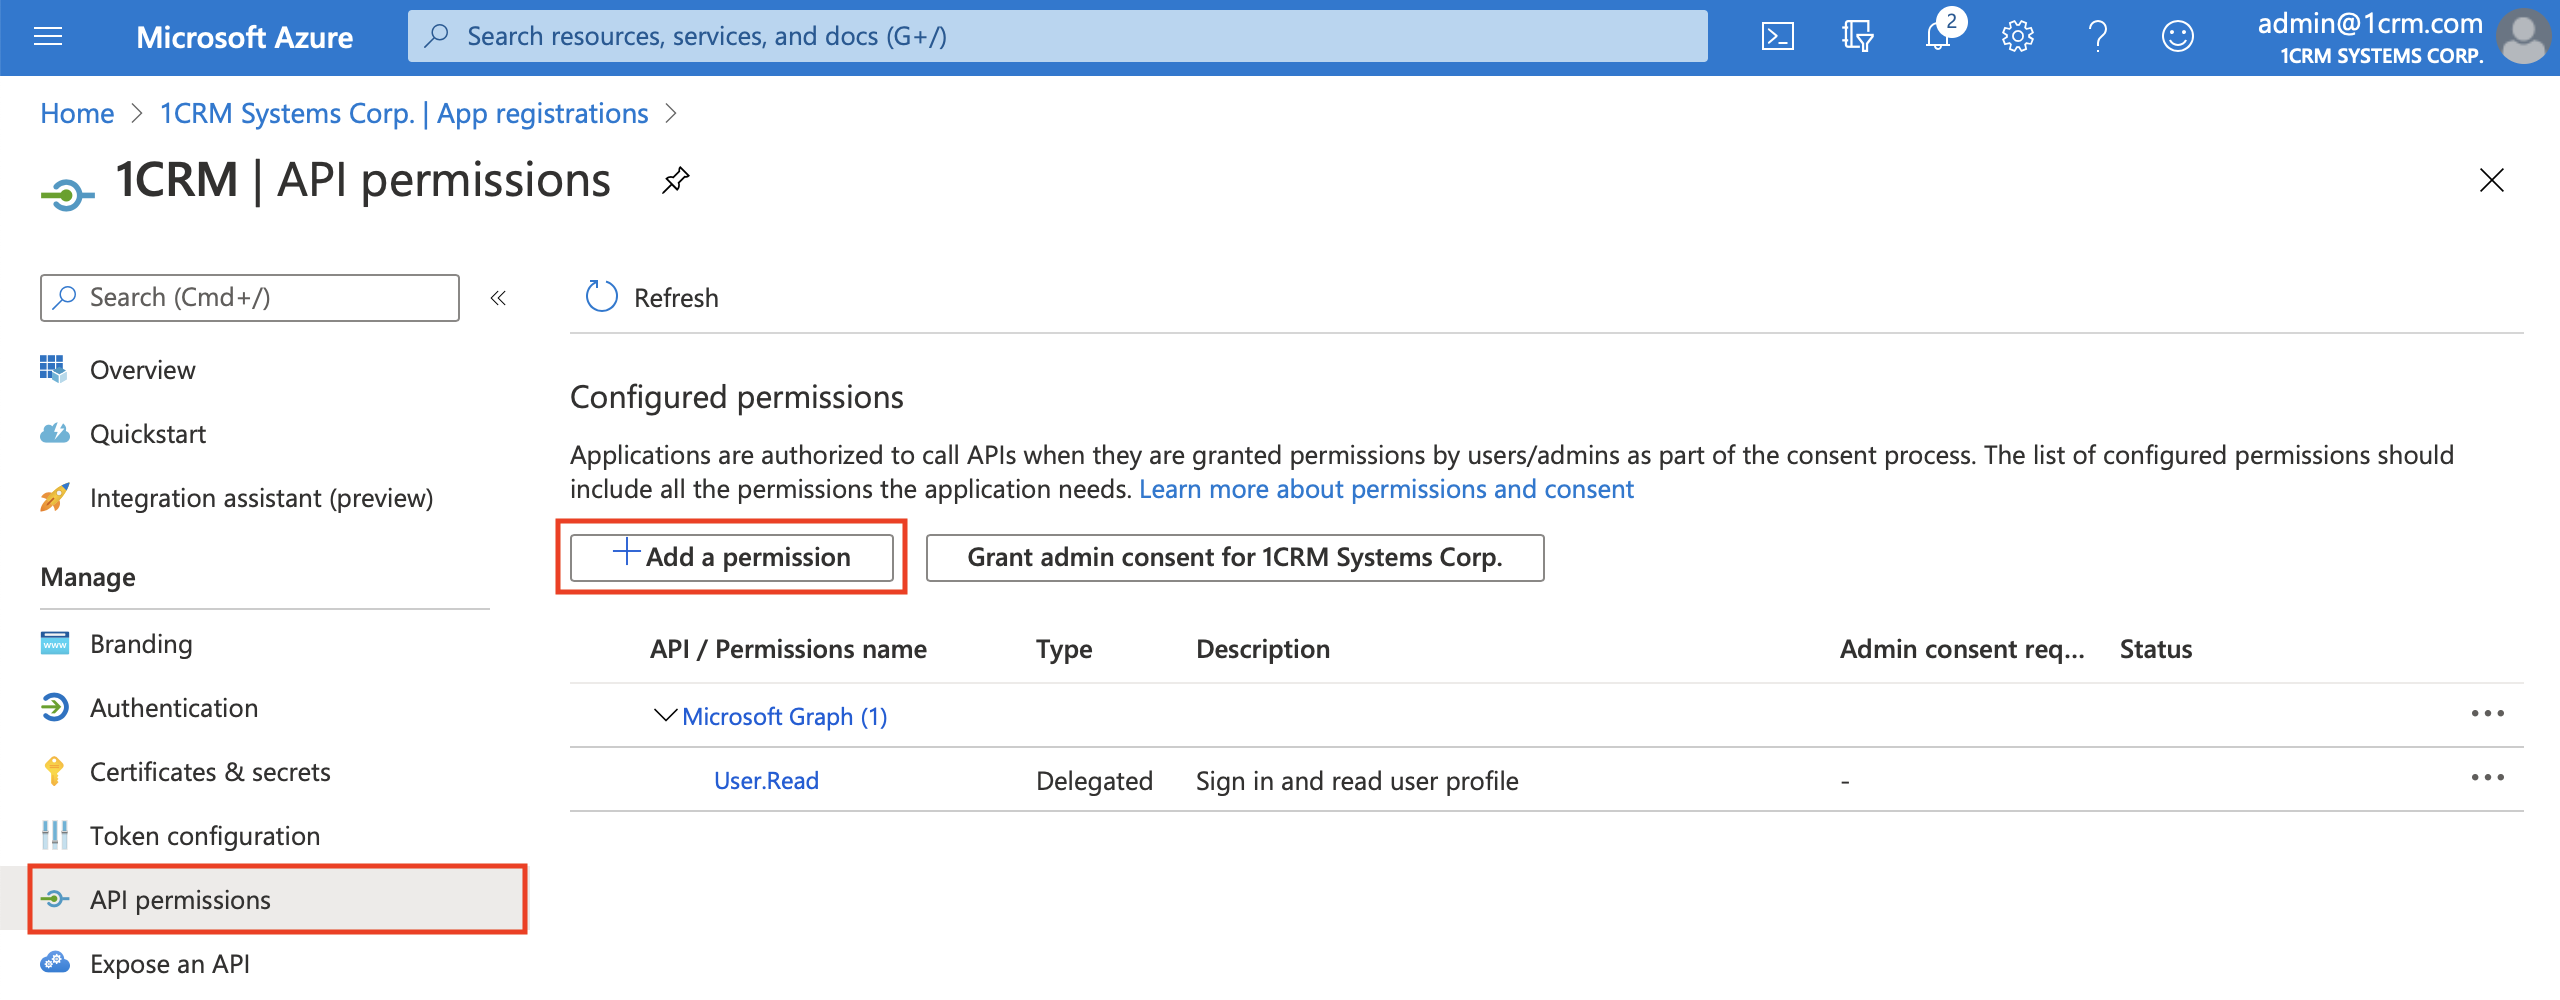
Set your App Permissions
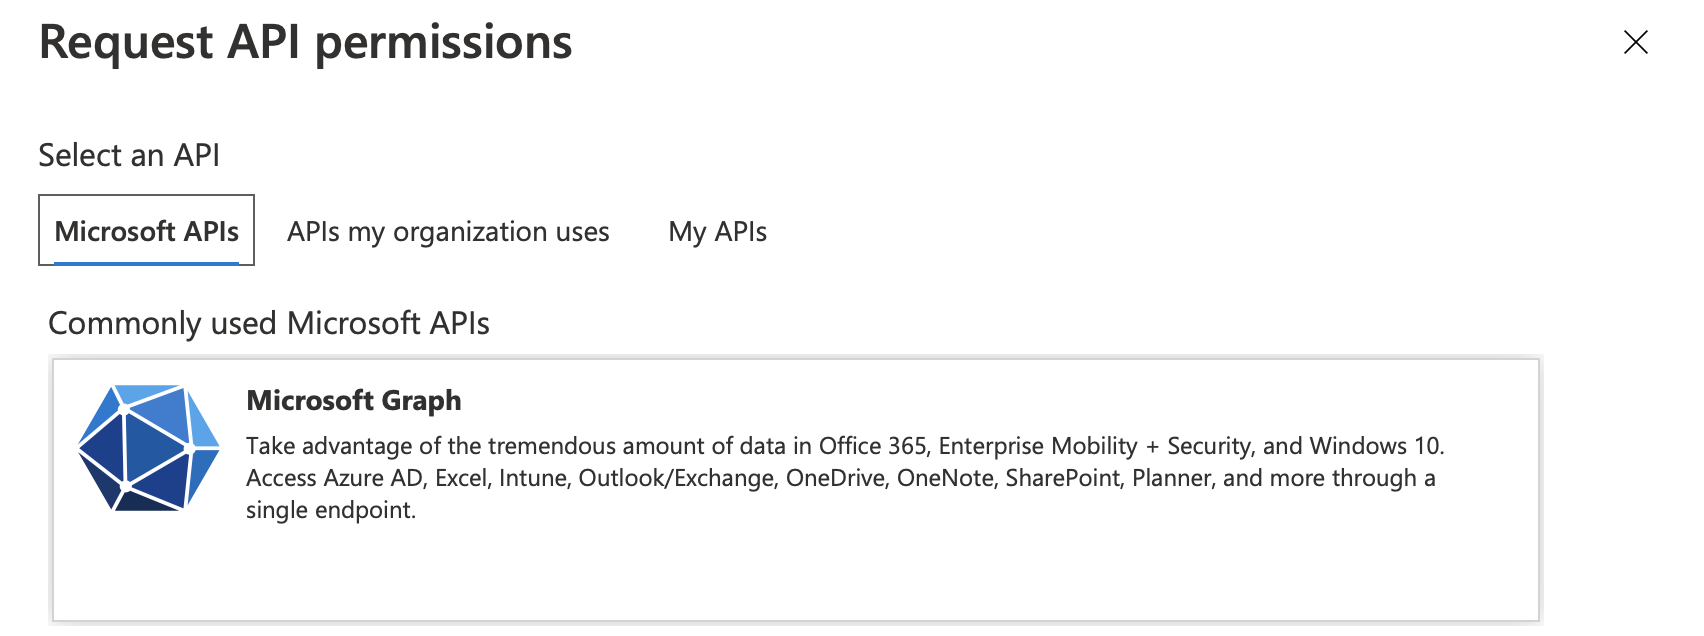
Set your App Permissions (Part 2)
Step 2: Authorize your Microsoft Account
- After you have registered your Azure app and entered the Client ID and Client Secret details, you have to authorize your account. As a 1CRM System Administrator, go to the Company Information screen with the 1CRM Administration area. In the Microsoft Teams Authorization section click the Authorize button. Log in to your Microsoft work (business) account if asked, and when the popup Window opens (if it doesn’t, make sure you allow popups) tick Consent on behalf of your organization and then click on Accept.
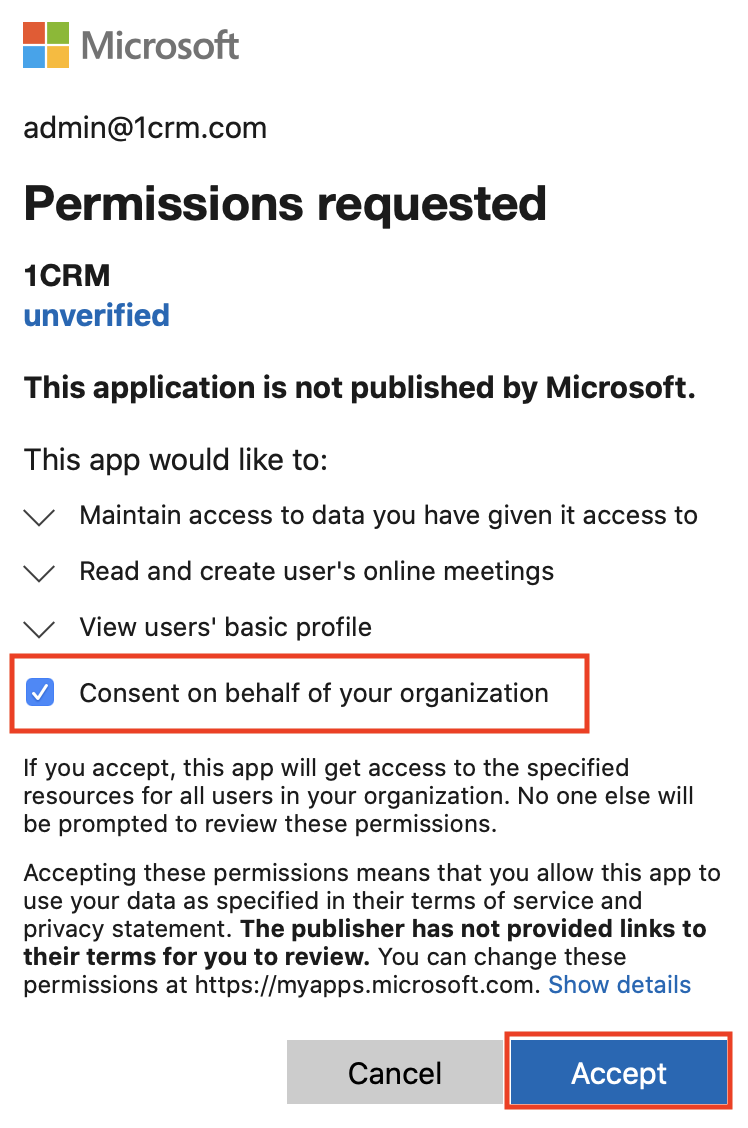
Consent to App Permissions
- Then Save the Company Information settings. You should see the Online Meetings panel looking like the image below when you next open the Company Information screen.
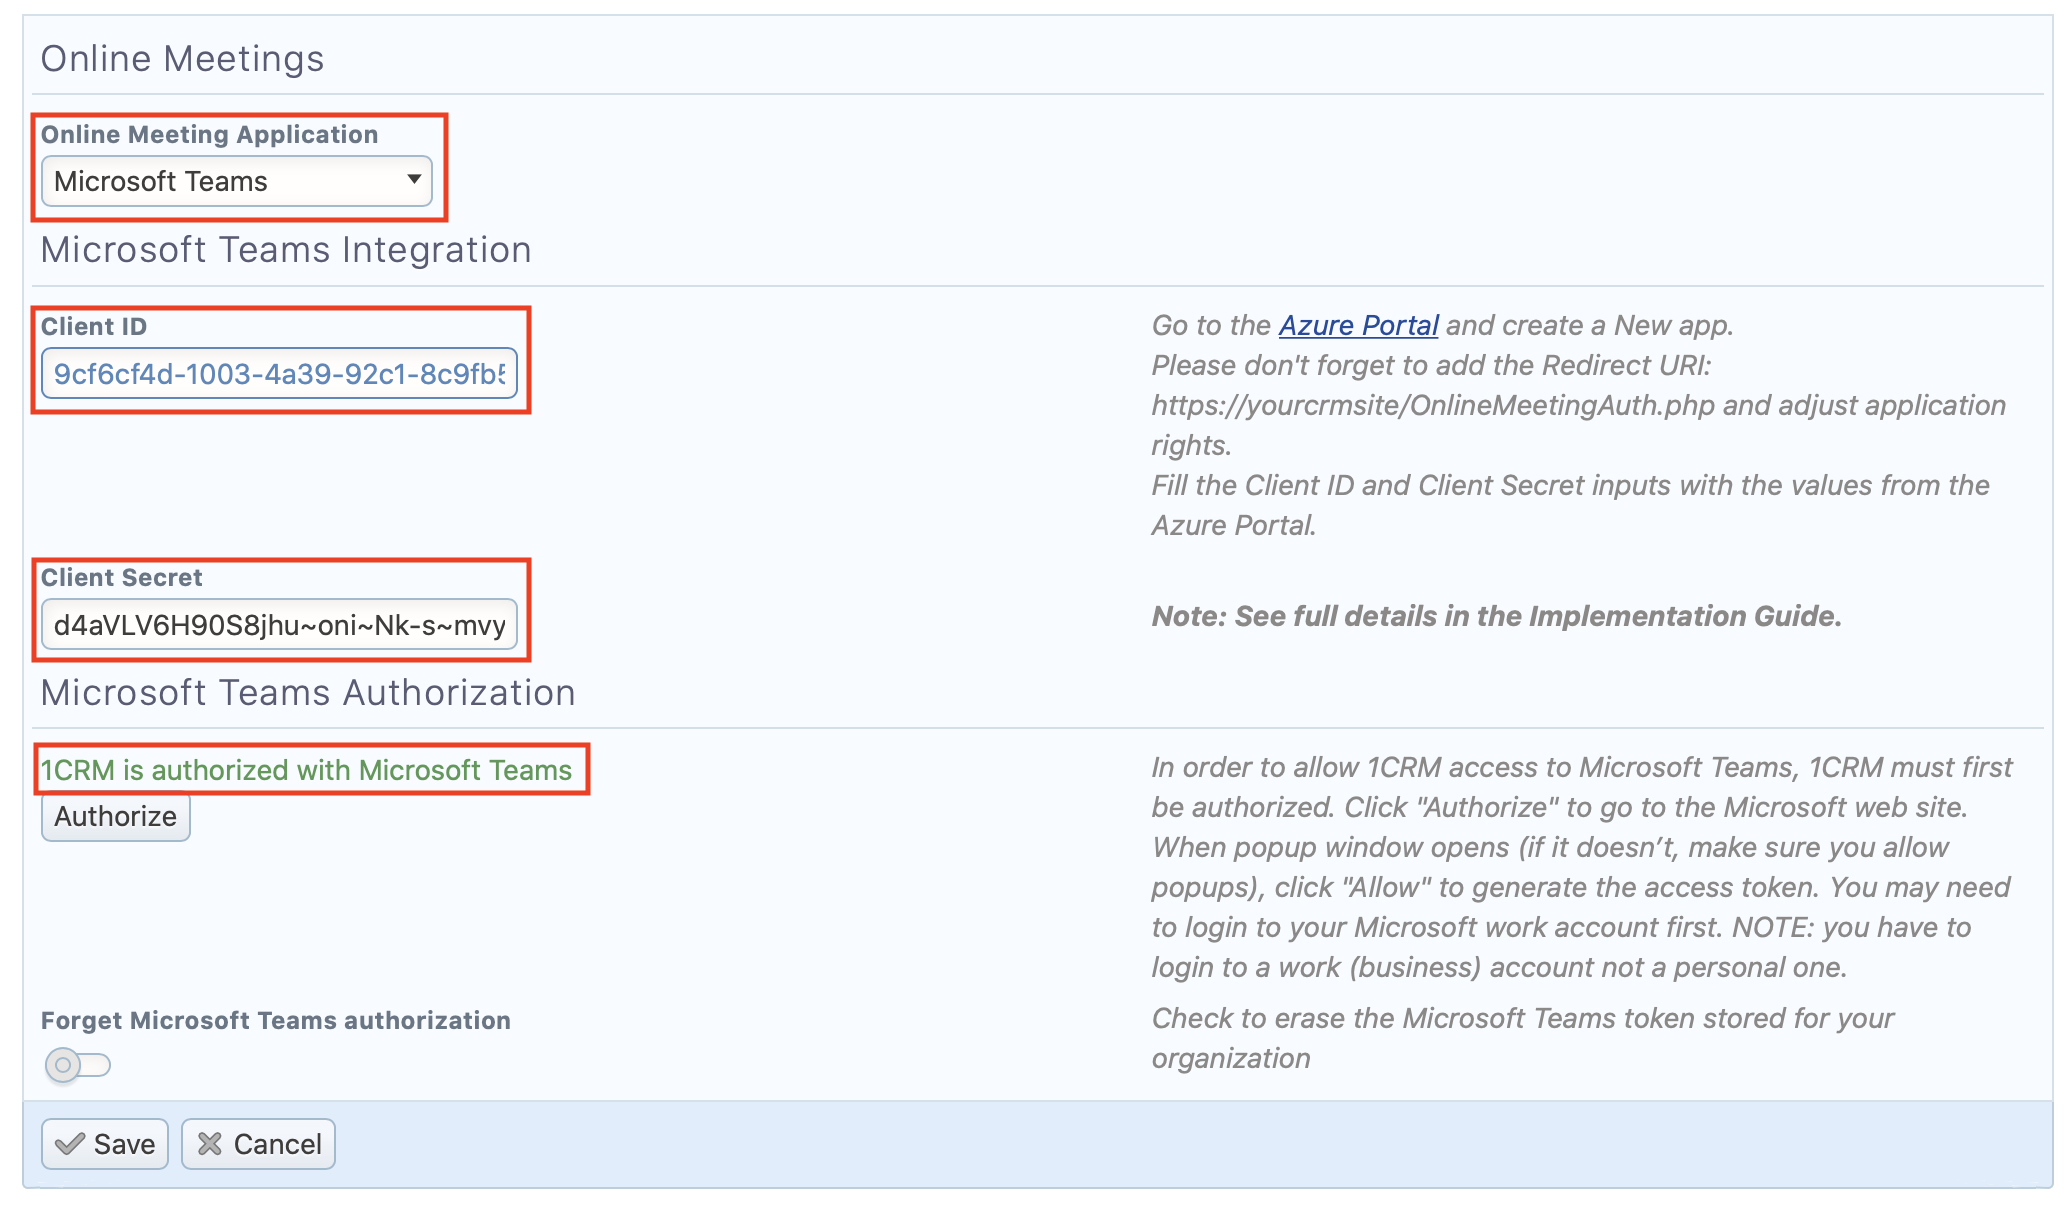
Online Meetings Panel of the Company Information Screen in Admin
- You have now enabled the use of Microsoft Teams for all of your 1CRM users. By default, they will use the Teams account you authorized here. To enable 1CRM users to each use their own Teams account, they each need to perform Step 3 below.
Step 3: User Authorization of their Teams Account
- If any 1CRM Users plan to make use of the Teams integration, first the System Administrator needs to perform the steps above. Now each user needs to go to the My Account screen, select the Integrations tab, and Edit. Scroll down to the Microsoft Teams Authorization panel on that screen.
- Click Authorize to go to the Microsoft website. When a popup window opens (if it doesn’t, be sure to allow popups in your browser for this site) click Accept to generate the access token. You may be required to login to your Microsoft work account first. If you do not authorize your own account here, any Online meetings you schedule will use the company account authorized in Administration – Company Information by your System Administrator.
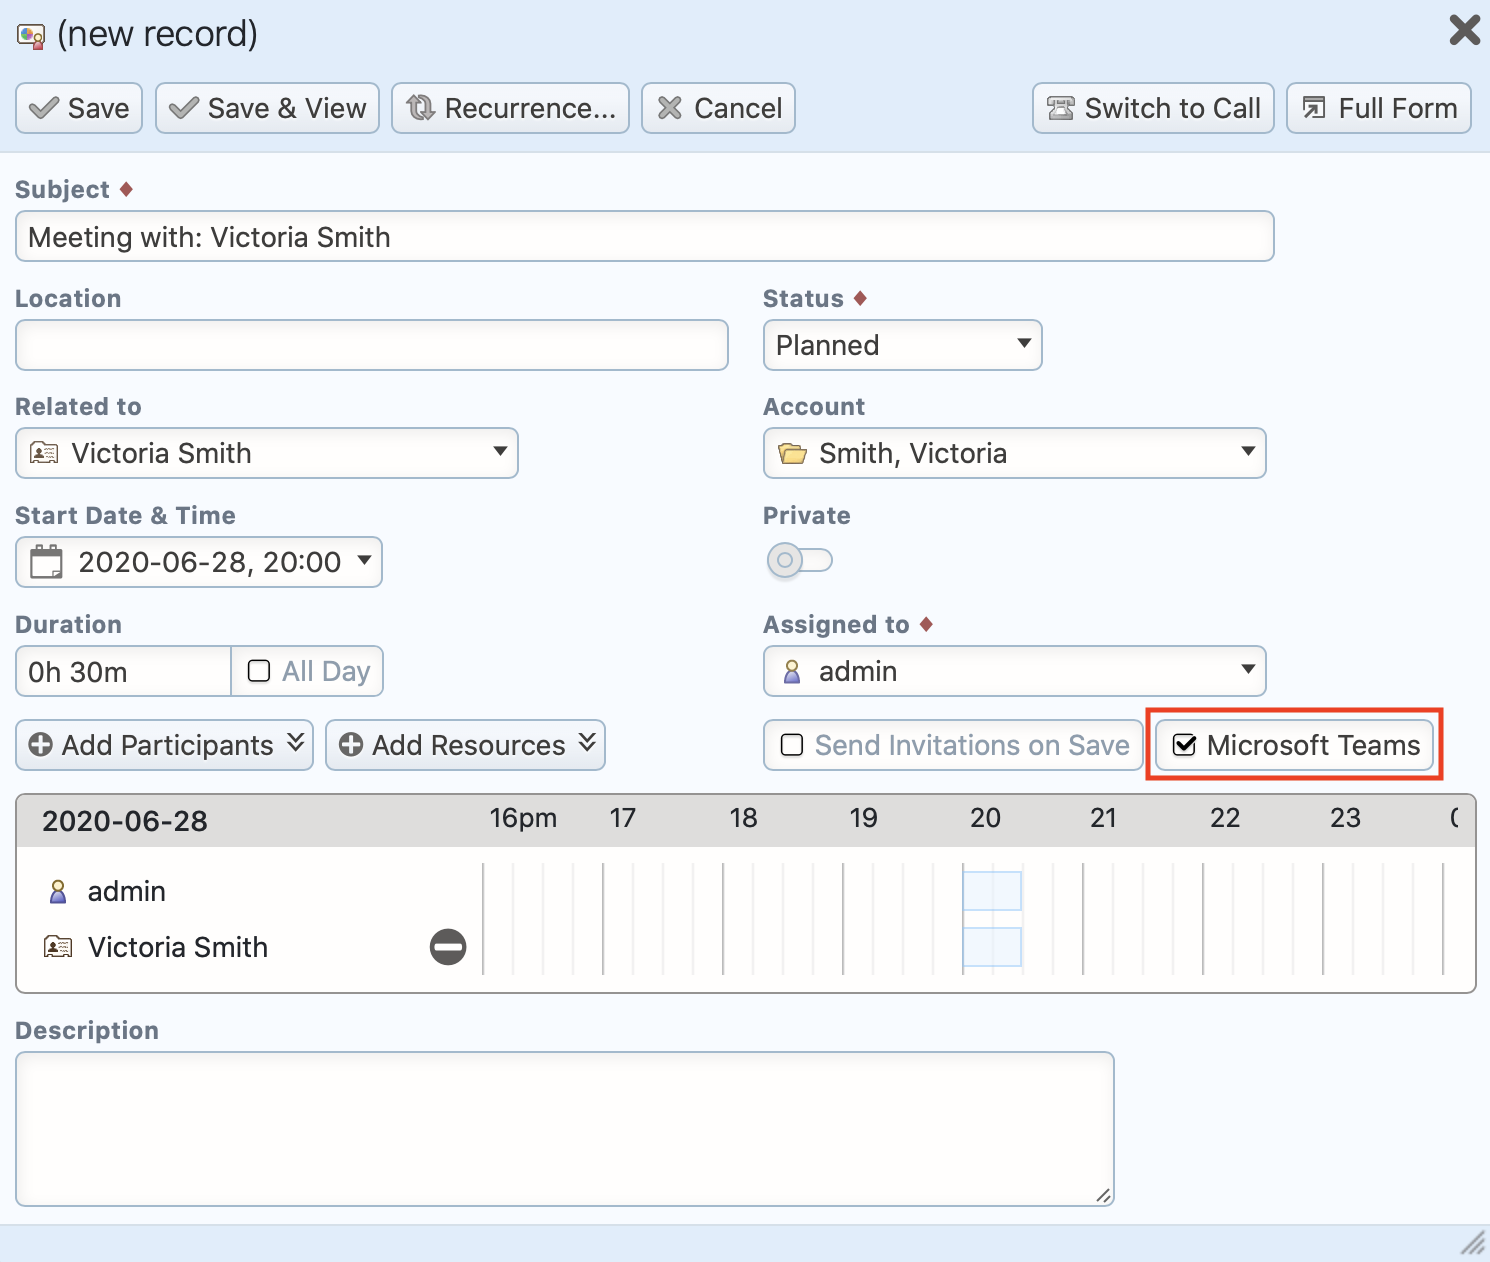
- Now Save your My Account settings. Once this is done, you will be able to schedule Online meetings by simply ticking the box for Microsoft Teams when you schedule any meeting within 1CRM, as shown in the figure below.
Schedule a 1CRM Meeting with an Online Teams Session
- When you Save the 1CRM Meeting, 1CRM links to Microsoft Teams and schedules the session you need, then returns a link to the Online meeting, which is displayed on your 1CRM Meeting.