
Server Setup
Basic Admin
System Email Setup
Create Users
Getting Started with 1CRM
Phase 1: Basic Setup

Phase 1: Basic Setup


If you have just signed up for a brand new 1CRM subscription – whether on the 1CRM Cloud, or as an On Premise subscription, you are probably wondering “What do I do now?”. This brief guide is intended give you some answers to that question.
One of your first issues will be wondering if you can or should set 1CRM up by yourself, or pay to have some or all of that process done for you. Have a look here to get some information to help you make that decision. That gives you some information about the services available: you can just get a few specific tasks done for you on an ad hoc basis, or buy a full implementation service at a fixed price.
As a comparison, look at the 1CRM Implementation Guide to decide if you are comfortable that you and/or other staff can perform the tasks described there.
Note: Links to specific pages within PDFs only work in the Firefox and Chrome browsers. For other browsers, please check the page number at the end of the link.)
Server Setup: On Premise Installations Only
Next, regardless of who is doing the work, if you are using an On Premise server (skip this section if you are using the 1CRM Cloud service) that server needs to be set up as per the Implementation Guide instructions, and then the 1CRM software needs to be installed with a few initial configuration steps:
Our blog post on how to install 1CRM on Ubuntu is the best place to get started.
How to Install 1CRM on UbuntuOn Premise Server platform installed with server operating system and 1CRM software. Implementation Guide: Chapters 4, 5, 6
Check system default currency is as desired (otherwise reinstall).
Implementation Guide: Section 7.1.4Check any required language packs are installed.
Implementation Guide: Section 7.2.3Check Help module is installed. Implementation Guide: Section 7.2.3
Check server certificate is installed, and https: access is working
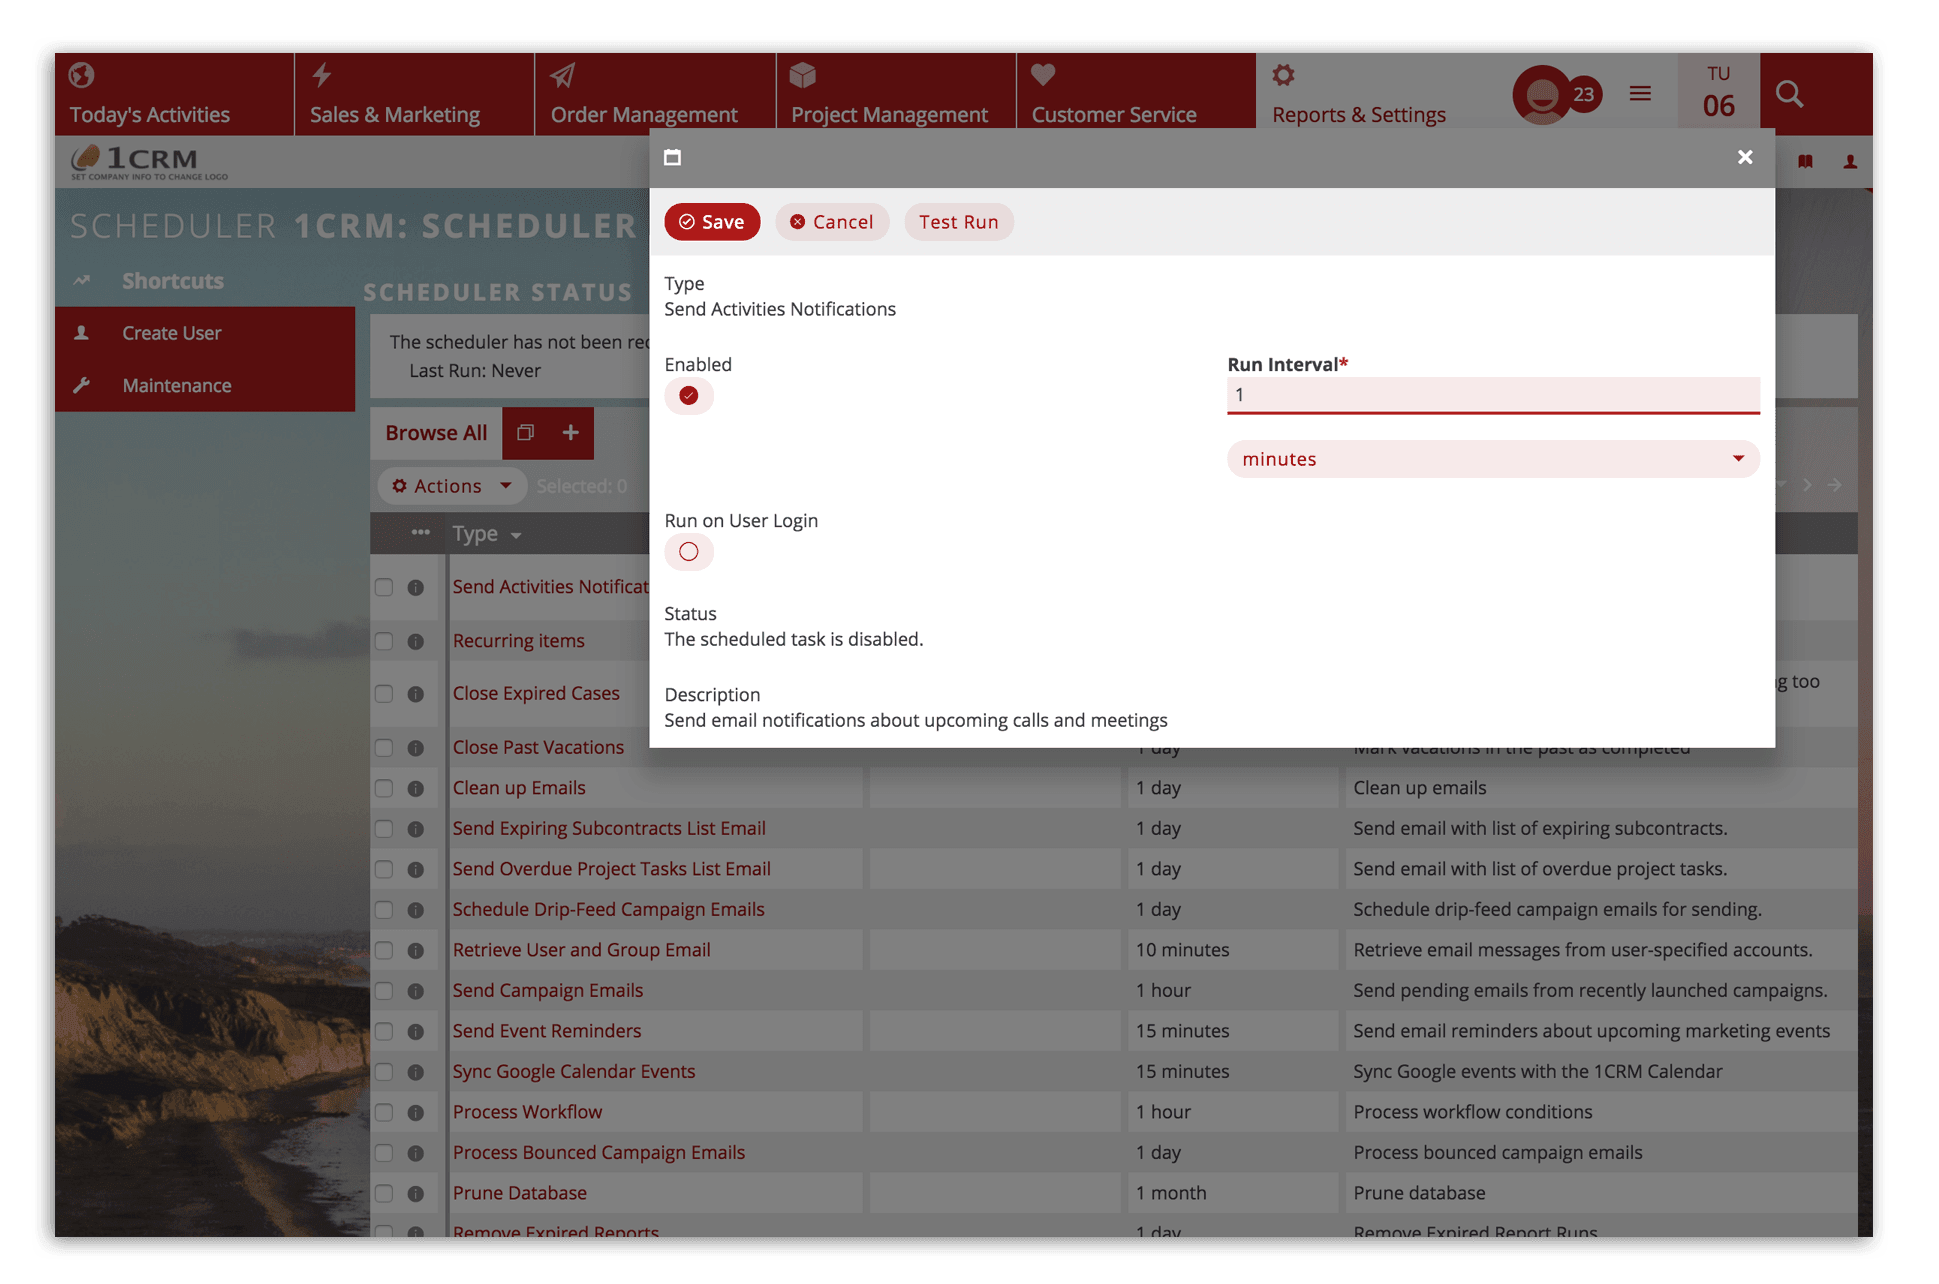
Admin – Scheduler: check scheduler is enabled and running, and enable scheduler tasks as needed. Implementation Guide: Sections 7.1.3 and 7.9
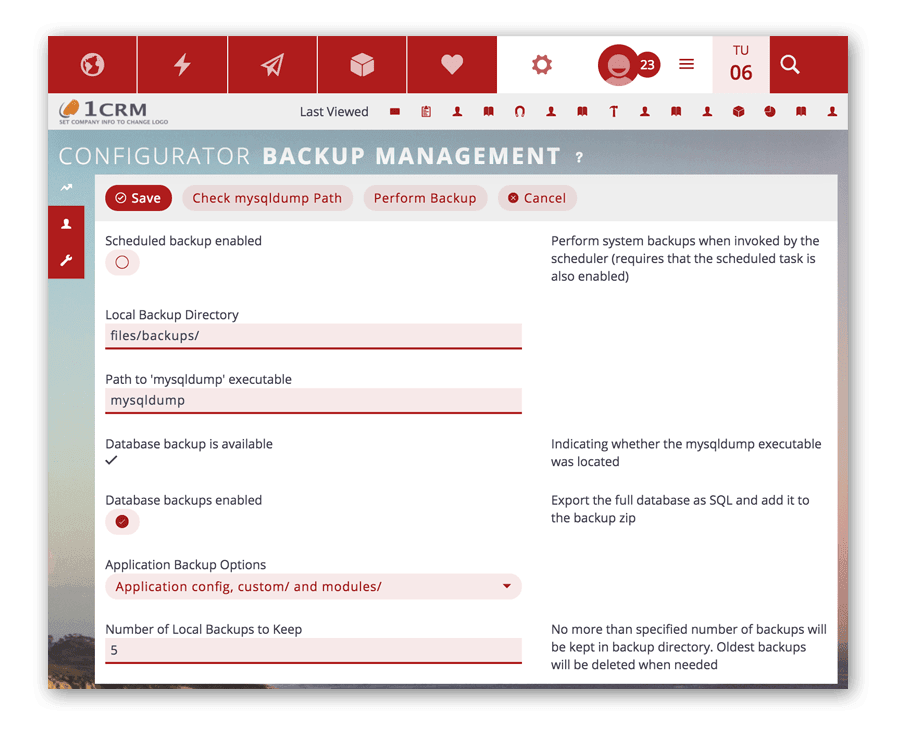
Now as a system administrator, configure the Admin – Backup Management settings to protect your valuable data. Backups can be sent to Dropbox, or via ssh/ftp to another server you control.
Implementation Guide: Section 7.2.2
Once you have backups working properly, configure the Admin – Company Information settings for your Application Login Page message. This message is shown to all users trying to login to the 1CRM system.
Implementation Guide: Section 7.1.1
Following this configure the Admin – Company Information settings in the General Information panel.
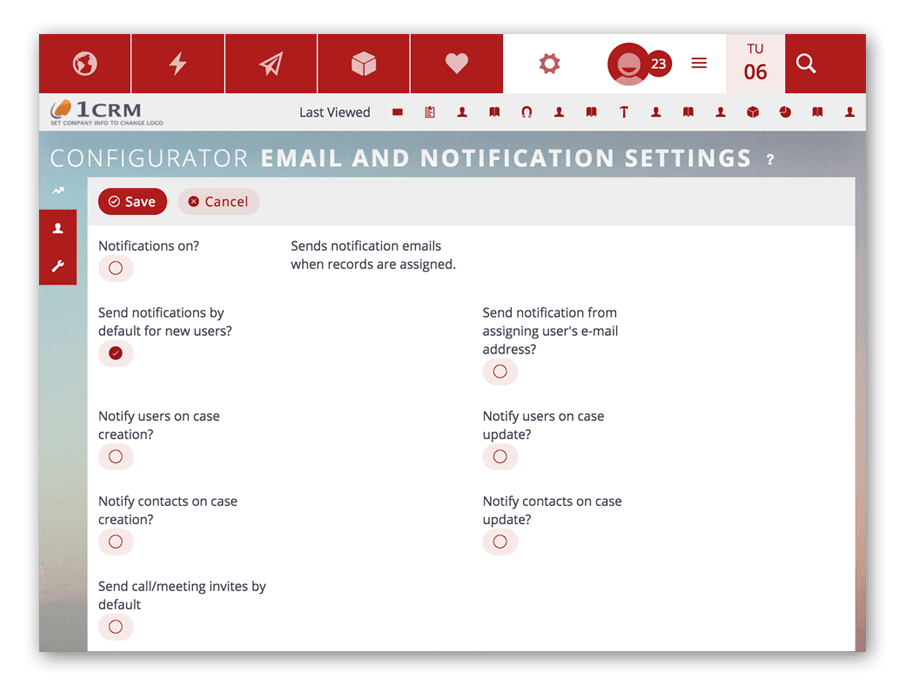
Next, configure the Admin – Email & Notification Settings, including those for your 1CRM server’s outbound email. This is very important, or none of your appointment reminder emails or email campaigns will function properly. Implementation Guide: Section 7.4.1
Customers using Microsoft Office 365 or Google Workspace should also consult our the guide on how to set up Modern Authentication on 1CRM. Implementation Guide: Section 7.1.2.1
Now, configure the settings for Admin – Group Inboxes if you will be using Email Campaigns or using company email boxes to automatically create service Cases. Implementation Guide: Section 7.4.3
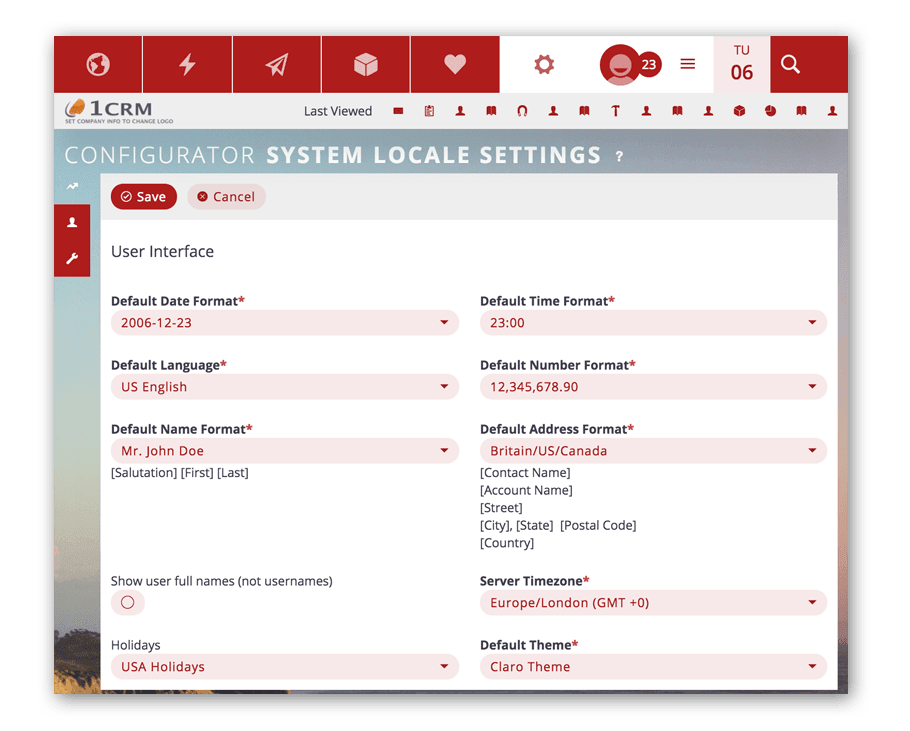
Once Group Inboxes are working correctly then configure Admin – Locale Settings. Define the settings on the User Interface and Telephony panels, including server timezone and default theme. It is important to do this before you begin adding users to your system.
Implementation Guide: Section 7.1.5
After that, go to Admin – System Settings and configure the values for User Interface, Export.
Implementation Guide: Section 7.1.2
After that use the Admin – Users – User Management screen to define your system users. Note – you can only add as many Active users as you have purchased licenses. Implementation Guide: Section 7.3.1
