Harnessing Digital Efficiency and Security through Trust
As businesses strive to optimize their workflows, we are there to support you. In a collaboration between 1CRM and Notarius, this integration is the first of three integrations designed to help 1CRM clients access Portage CyberTech’s Online Services Platform.
In this article, we explore the seamless integration of these systems, offering businesses the unique opportunity to streamline their CRM processes, while ensuring the utmost security and compliance in their document signing workflows.

Requirements
Benefits
If you have used 1CRM’s Order Management tools, you’ll be aware of the ability to send out documents such as quotes and invoices via email. If you are a 1CRM Enterprise customer, you’ll also be familiar with the ability to customize PDFs using the PDF form editor.
The 1CRM and Notarius integration for ConsignO Cloud allows 1CRM clients to combine the flexibility of the PDF form designer, with the enhanced document workflow process and digital security that ConsignO Cloud offers.


Are you wondering what this integration may bring your business? Here are five key benefits to integrating 1CRM with ConsignO Cloud.
Enhanced Document Workflow
Accelerate Your Sales Cycles
Enhanced security and compliance
Improved Customer Experience
Value for Money
Getting Started
Getting started couldn’t be easier, just follow these simple steps to connect 1CRM to ConsignO Cloud:
When logged into your ConsignO Cloud account, navigate to your name in the Top Right Corner and enter the My Organization screen. At the bottom of that screen, press Generate API Key and enter the information as prompted before pressing Generate.
Inside 1CRM, Copy and paste the Client ID and Secret found inside ConsignO Cloud. You can find these fields by navigating to:
- Administration
- System Settings
- Consign Cloud Settings

Creating a Document Template
Once you have established your settings, you can then start to design your signed document templates.
Using the PDF Form Designer in Administration we are going to create a new Quote template that will require both the signature of the Signer, and the Approver.
First, select the Default Quote template found inside the list of PDF Template options. As you are not able to Edit a default template, select the duplicate button towards the top of the page. This will create an identical PDF Template in which you can start to customize.
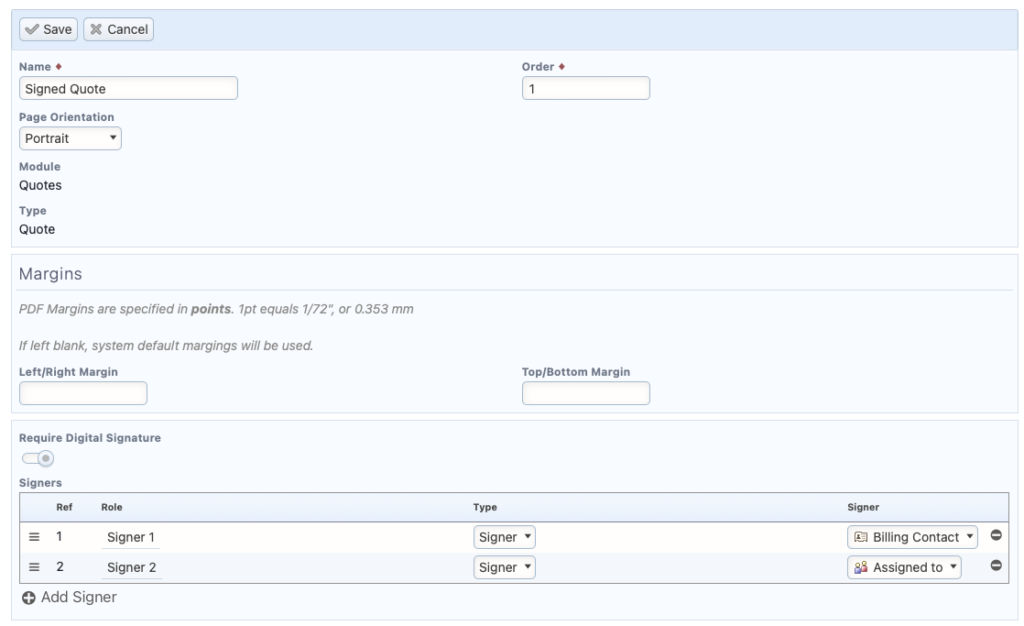
Click inside the field ‘Name’ and change the text to Signed Quote. This will help you recognize it in both the list of templates, and to eventually start the signing process. Next, select the checkbox labelled ‘Requires Digital Signature’ so that the checkbox node is switched to the right hand side ‘On’ position. This will make a new section appear called Signers, in this section, use the ‘Add Signers’ button to add two new lines to the subsection, and ensure both the Type of ‘Signer 1’ and ‘Signer 2’ equals Signer. We will then designate ‘Signer 1’ to be the Billing Contact in the Signer column, and ‘Signer 2’ to be ‘Assigned To’ in the same column. This tells 1CRM that Signer 1 is most likely the client, and signer 2 is the internal resource that will approve the signature. If you have successfully followed these steps, your page should look like this:
Before you save the changes, be sure to add your signature elements to your PDF. You can do this by navigating to the footer of the PDF designer and left clicking in any open space. 1CRM will add a blank signature element in which you can programme it to be for either Signer 1, or Signer 2. You will want to add both in here, in a way that is easy to see for the user. You may or may not wish to delete the old signature block from the template. Out with the old, in with the new!
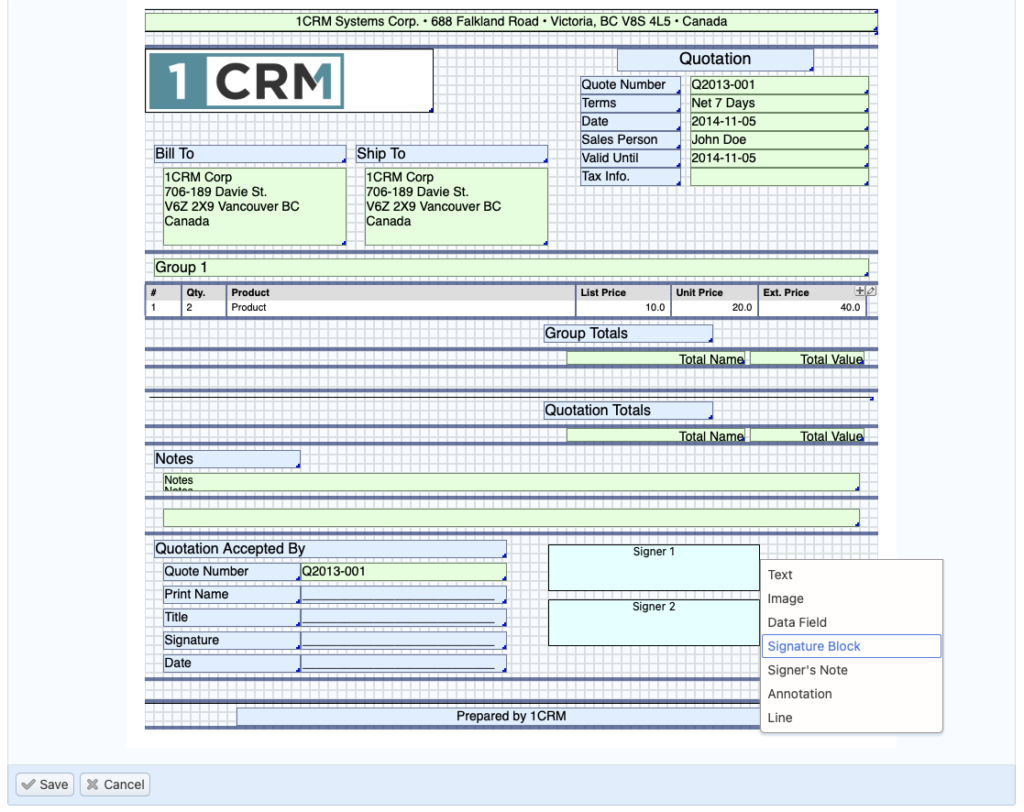
Now press ‘Save’, and we are ready to send out our first document for signature.
Sending a Document for Signature
Up until this section, everything you have done you will only have to do once (unless you want to create multiple templates). Now you will begin a signature process. After creating a quote, you will navigate to the quotes module and select any quote record. While in the Detail view, you can select the Print button and pick out Signed Quote from the list of available options in the ‘Use PDF Form’ dropdown.
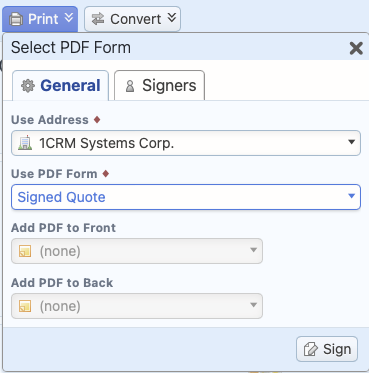
Click the ‘Sign’ button and after a small delay, a Document and Signing Project is created which can be found in the Quote Signed Document sub-panel.

If Parallel Signing is active, both signers will receive the document at the same time to sign. If parallel signing is not active, the document will be sent to Signer 1. Once Signer 1 has completed their signature process, the document will be sent to Signer 2 to complete their part.
In either scenario, the signer, using the second authentication process will complete either the SMS, phone call or secret answer before getting the chance to review and either approve or reject the document.
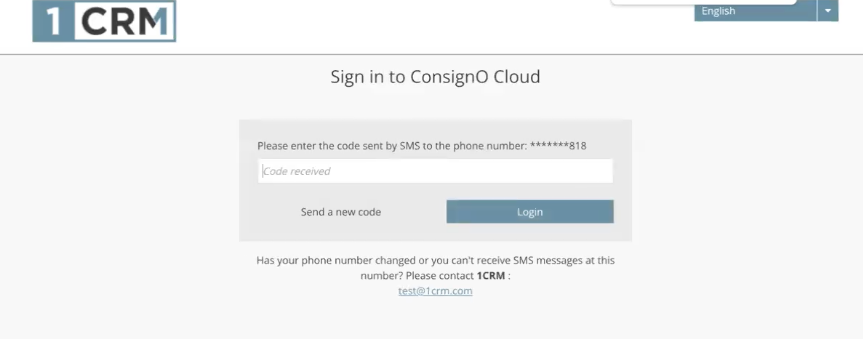
Once you have navigated through the second authentication screen, you are directed to the signature page where you can approve the document.
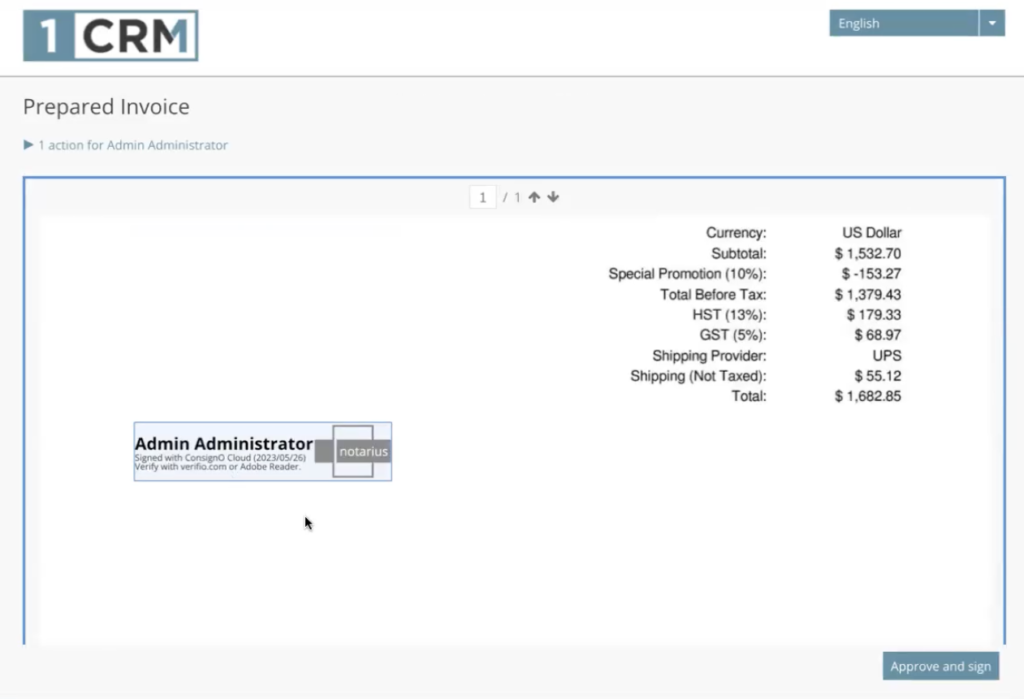
Once everyone has signed, the final document will be available either by navigating back to the sub panel in the record, or by going to the Signing Projects module and finding the associated record. Inside the Signing Projects record you are able to see more information, such as the remaining actions (signers left to sign the document), the audit trial PDF document, the status of the document and the actions completed (or yet to be completed).
To update to 8.7.6. or get more information on your 1CRM subscription, please contact support@1crm.com
Get Your 1CRM 30-Day Free Trial
Want to test drive 1CRM 8.6? Try it out for 30 days – on us!
With no credit card required, you can sign up and be online within minutes!
